Espresso martini trifle (vegan)
Desserts, vegan

Espresso martini trifle (Vegan)

Makes 6-8 servings

Espresso martini trifle (vegan)

If you like the espresso martini cocktail you will love this dessert!
I’ve been thinking of transforming one of my favourite cocktails into a dessert for a while; so I finally made this trifle for my actual birthday this year.  This espresso martini trifle turned out better than I imagined and I thought the world needs this!  
Definitely a dessert for grown ups with rich chocolate, coffee, booze and some whipped cream to balance it all.
Unlike my gin, lemon and raspberry trifle (which is to die for!), this one is fairly simple and easy to make. Also, this is an excellent dessert to make in advance, so you can enjoy your big day without spending time in the kitchen.

For what special occasion would you make this dessert? Remember to tag @apinchofzing on Instagram if you give it a try. 

Trifle elements
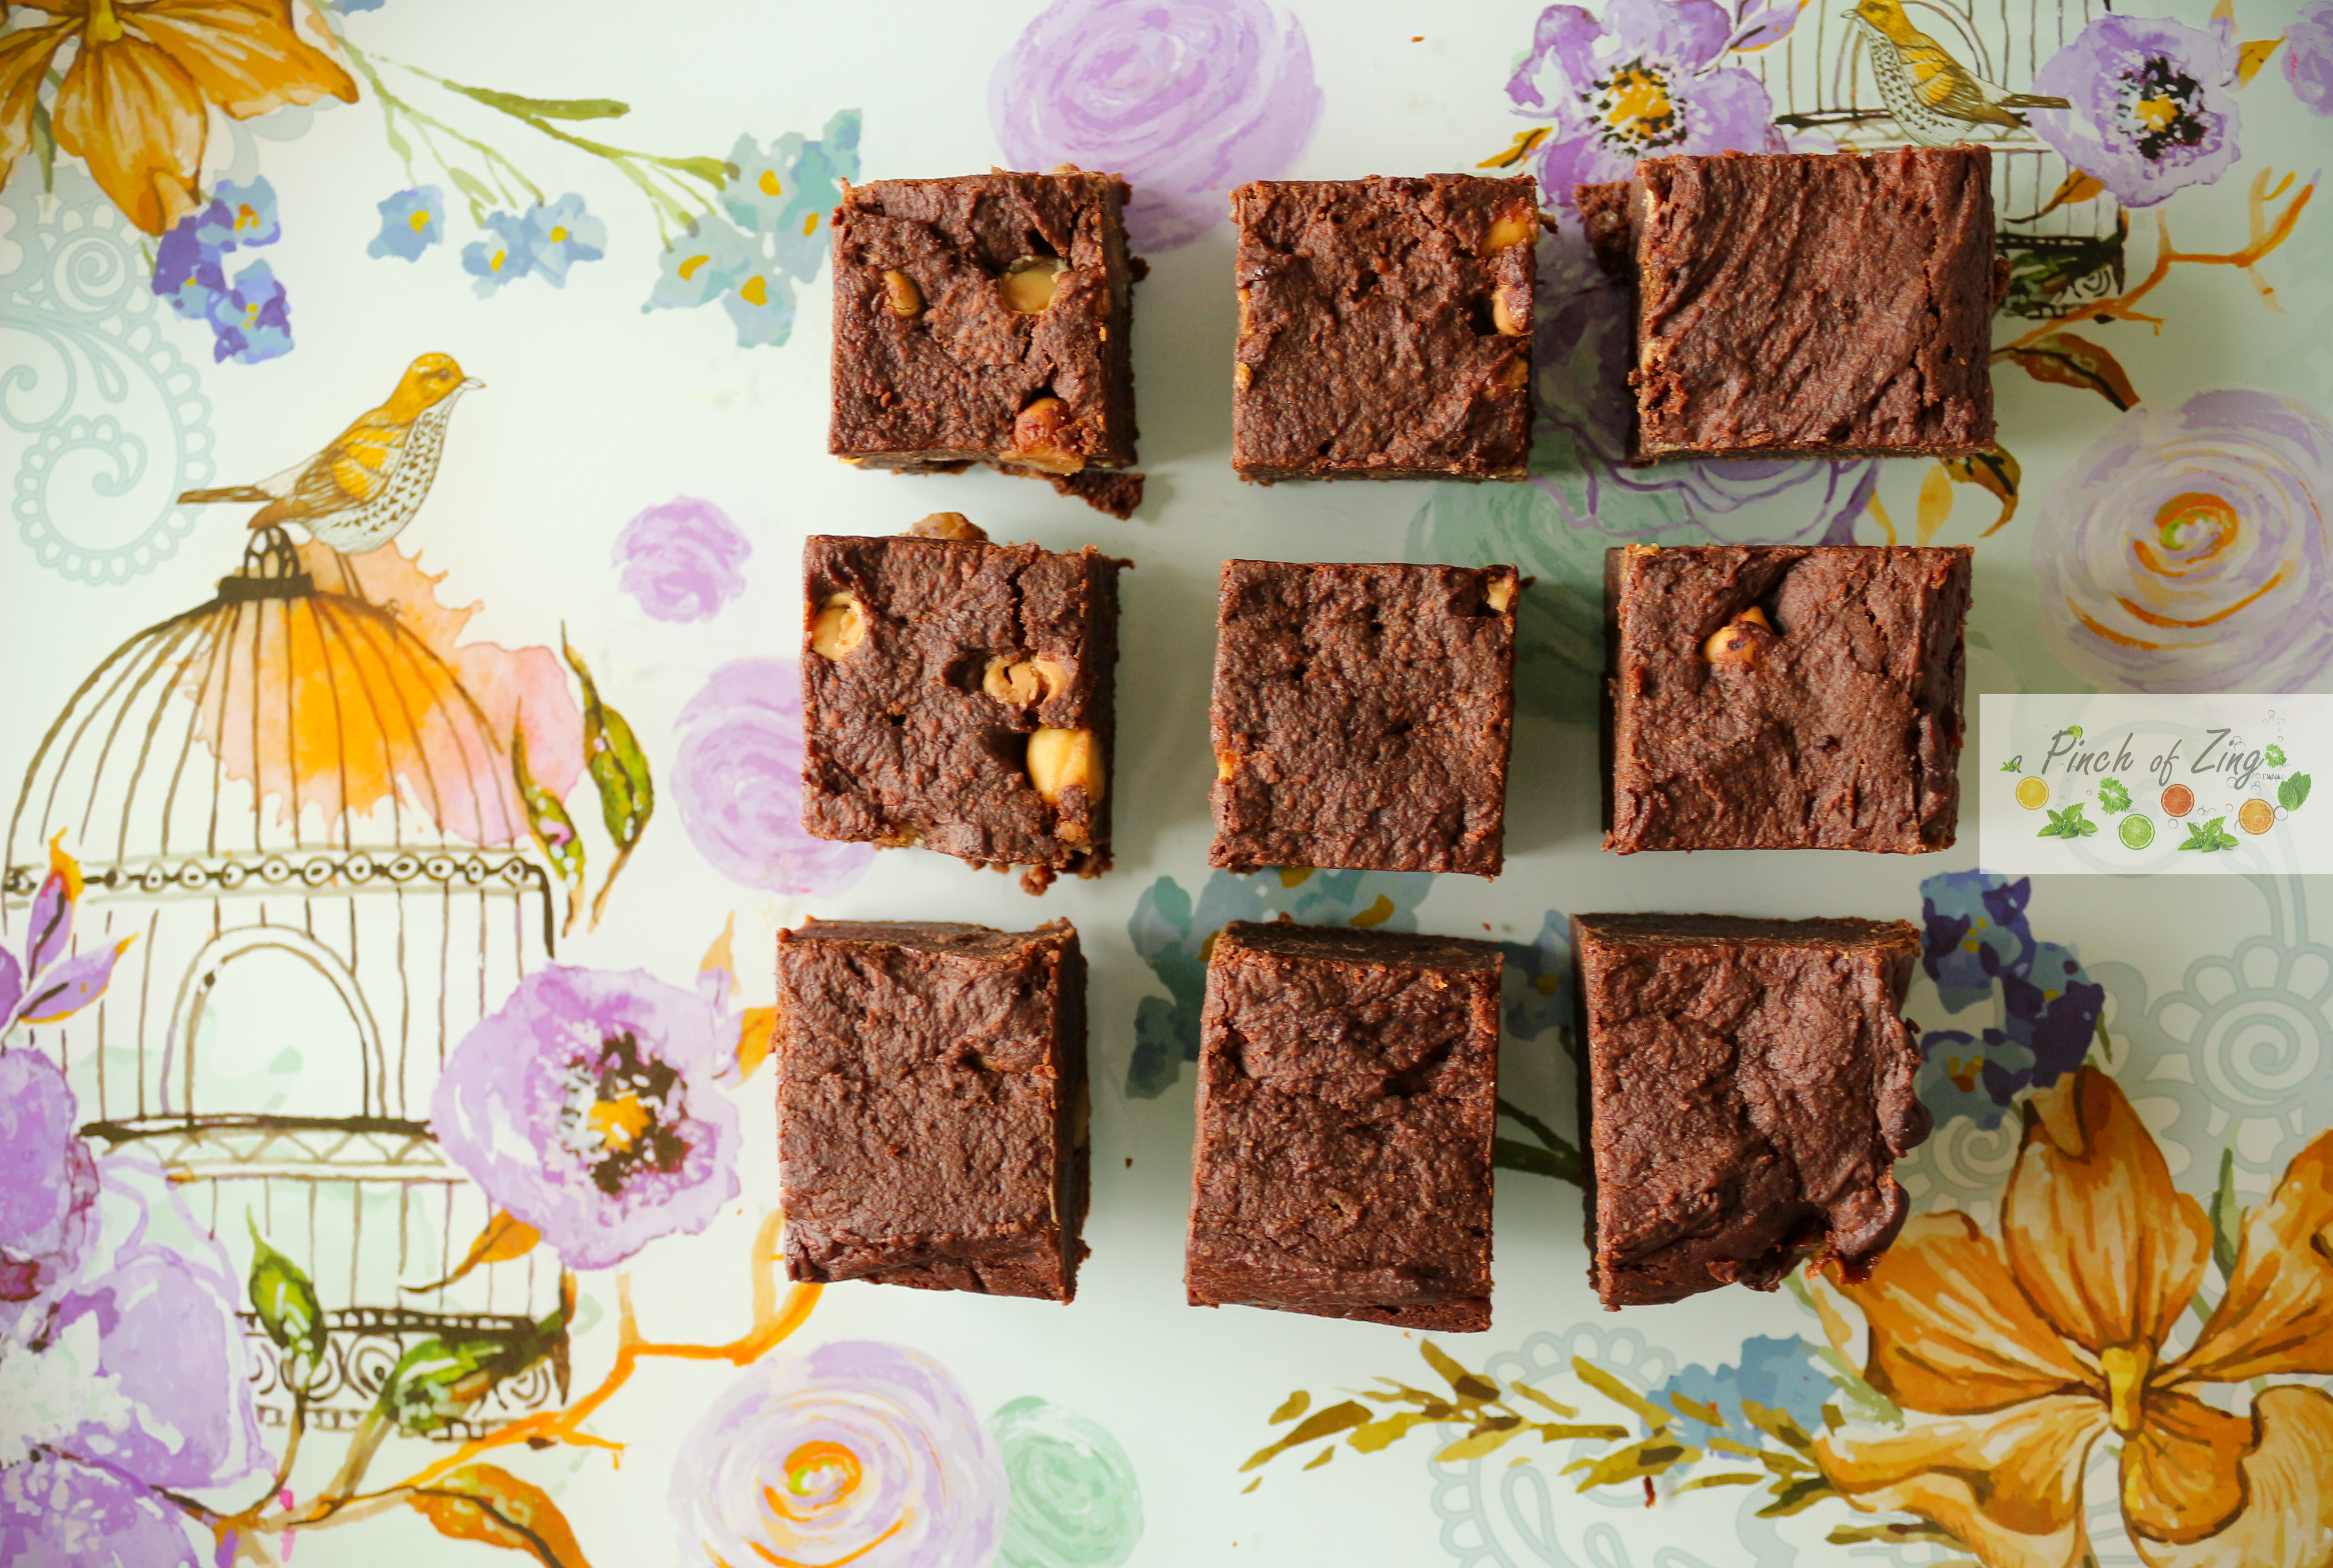
1 x chocolate sponge layer
1 x Espresso martini cocktail (or two if you fancy a glass)
1 x chocolate ganache layer
1 x whipped cream layer
Cocoa powder for dusting


Step 1. Make the chocolate sponge

Ingredients
1 teaspoon vegan spread and 1 teaspoon flour to coat the cake tin
3/4 cup soy milk
1 teaspoon cider vinegar or lemon juice
1 & 1/3 cups plain flour
1 tablespoon cocoa powder
1 teaspoons baking powder
¼ teaspoon baking soda
1/3 cup sugar
a pinch of salt
1/4 cup rapeseed oil
1 teaspoon vanilla extract

Method
1. Preheat the oven to 190C. Grease with vegan spread and coat in flour, a 20cm round cake tin.
2. In a medium bowl mix the dry ingredients (flour, cocoa powder, baking powder, baking soda, sugar, salt).
3. Add in the wet ingredients (curdled milk, oil and vanilla) and mix together until combined. Don’t overmix.
4. Pour the batter in the cake tin and bake for 20 minutes. Remove from the oven and leave to sit in the cake tin for 5 minutes. After 5 minutes, remove from the cake tin and leave to cool on a wire rack.

Step 2. Make the espresso martini cocktail(s)

Ingredients
100ml vodka
50ml espresso coffee
50ml coffee liqueur

Method
Mix all the ingredients in a glass or bowl.

Step 3. Make the chocolate ganache

Ingredients
200g dark chocolate
200ml coconut milk (from a can)
1 teaspoon instant coffee

Method
1.Use a microwave safe medium size bowl. Break the chocolate into chunks and add it to the bowl with the coconut milk and instant coffee. Heat in the microwave for 30 second intervals and mix with a spoon after every 30 seconds, until melted and combined. It took me about 3-4 30 second intervals. Do not over heat the mixture as the chocolate could burn and that will ruin the ganache.
2. Leave the resulting chocolate ganache to cool down completely and set. You could also place it in the fridge to speed up the process.
3. Use a hand/stand mixer to whip the chocolate ganache until it becomes fluffy and light (2-3 minutes). Store at room temperature, or else it will become too hard to work with it.

Step 4. Make the whipped cream

Ingredients
270ml Elmlea plant double cream
3 tablespoons sugar
1 teaspoon vanilla extract

Method
Add all the ingredients in a large bowl and whisk with an electric mixer on high speed until the cream thickens and forms stiff peaks. Cover and store in the fridge until ready to use.

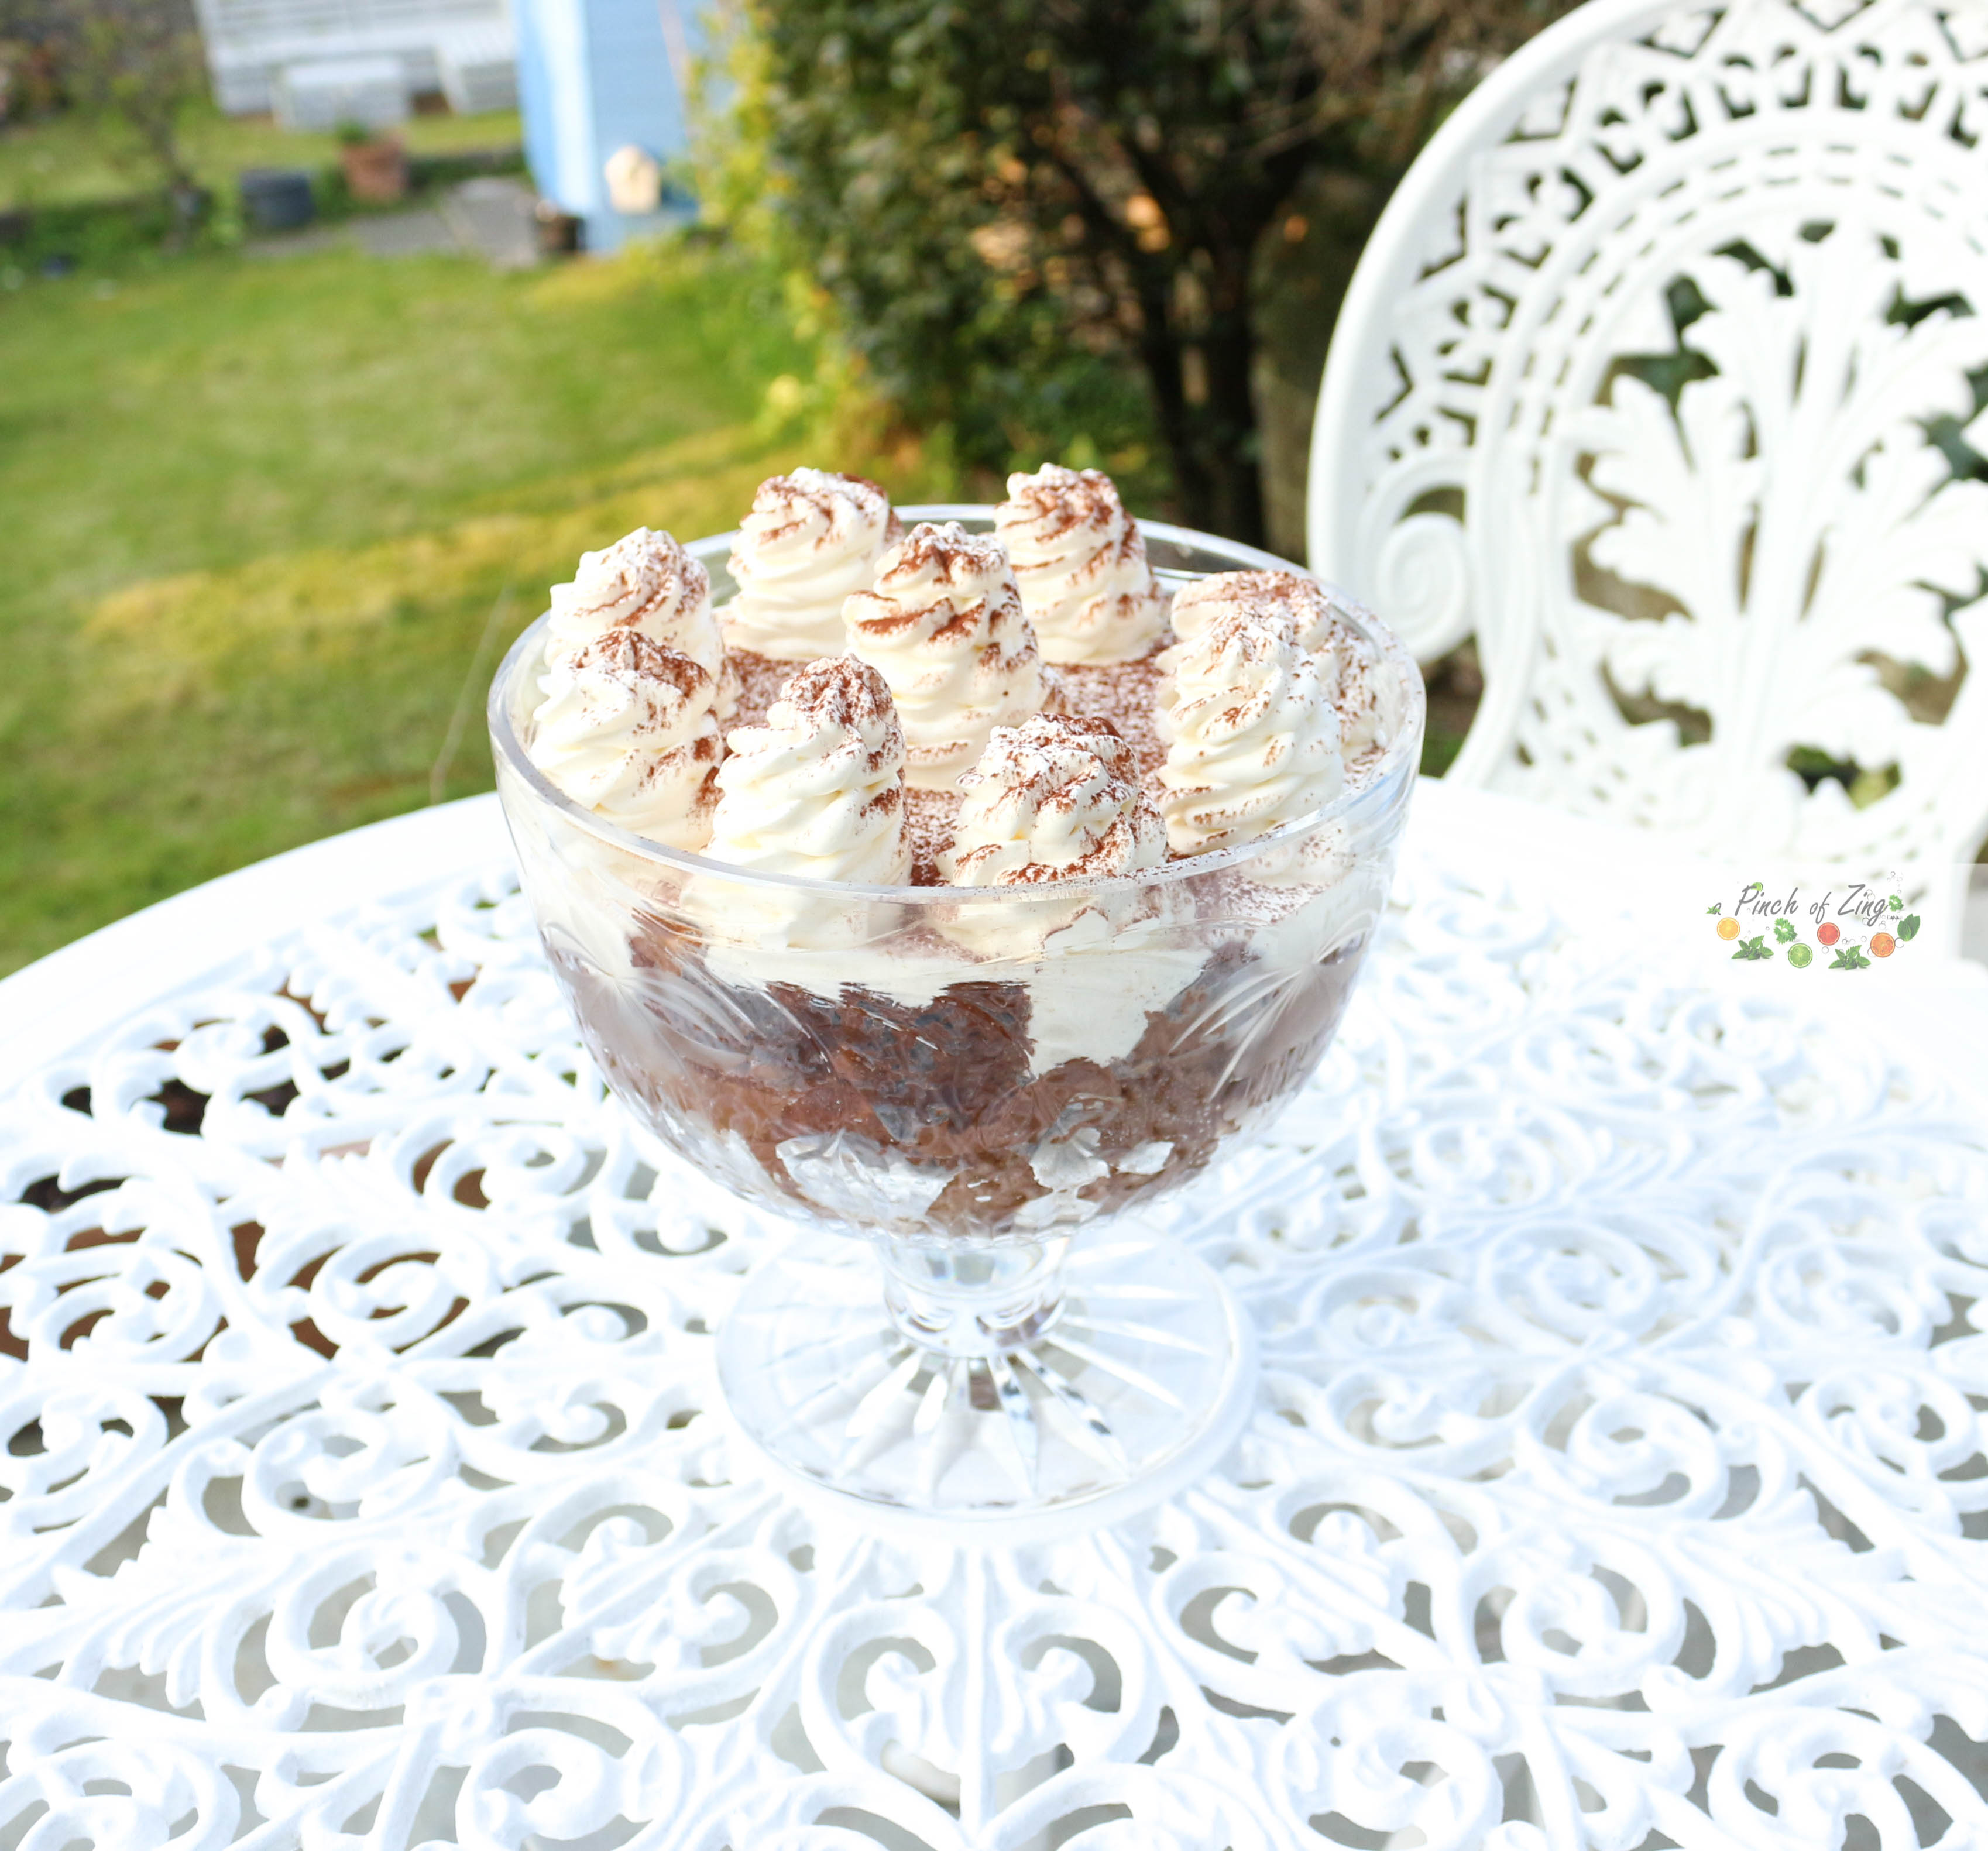
Step 5. Layer the trifle

You are now ready to assemble the trifle.

1. Cut the chocolate sponge in small squares and layer like a puzzle on the bottom and sides of the trifle dish.
2. Pour the espresso martini cocktail over the sponge.  
3. Put the chocolate ganache in a piping bag and pipe the ganache over the chocolate sponge.  
4. Put the whipped cream in a piping bag and pipe over the chocolate ganache layer.  
5. Cover and leave in the fridge overnight to set.
6. Dust with cocoa powder before serving. Enjoy 😊

Espresso martini trifle (vegan)

Desserts, vegan

Black Forest Cake (Vegan)

Makes 10 servings

Chocolate, cherries and cream – heaven!
Don’t know about you, but I can’t think of many combinations better than this one.

The black forest cake is one of my favourite cakes and surprisingly easy to make. It’s as simple as chocolate sponge, chocolate cream, butter cream, cherries and cherry syrup.
Every element is quick and easy to make with basic ingredients.
The chocolate cream is a game changer; you won’t believe how delicious whipped chocolate ganache can be! And now you know how to make the most amazing chocolate cream for any cake in just 5 minutes.
For the Black Forest cake you can use fresh cherries, cherries in syrup or cherry jam. I’ve used fresh cherries on this occasion because they are in season.
I’ve left the best news for last! You will end up having leftover ingredients to make yourself a little cake to test before serving this to your guests. You know…for quality testing 😊
The chocolate sponges turn out quite domed, so you will need to cut the top off to level them; use that extra sponge for your mini cake. There’s also going to be some leftover cream; just enough for you to build your mini cake. Remember to save yourself some cherries and syrup for that as well.
Enjoy a real treat with your loved ones. No one will believe this is vegan!

Ingredients

Chocolate sponge
1 tablespoon Flora buttery and 1 tablespoon flour to coat the cake tins
1 and ½ cup soy milk
2 teaspoon cider vinegar or lemon juice
2 & 2/3 cups plain flour
1/3 cup cocoa powder
2 teaspoons baking powder
¼ teaspoon baking soda
¾ cup sugar
a pinch of salt
½ cup rapeseed oil
1 teaspoon vanilla extract

Chocolate cream
200g dark chocolate
200ml coconut milk (from a can)

Buttercream
100g Flora buttery
150g icing sugar (sifted)
1 teaspoon vanilla extract

Syrup
50ml cherry brandy
75ml cherry syrup (from a jar of cherries in syrup)

Other ingredients
200g cherries or cherry jam

Method

Chocolate sponge
1.Preheat the oven to 190C. Grease with Flora buttery and coat in flour, two 20cm round cake tins.
2. Heat up the milk for 30 seconds in the microwave and add the cider vinegar. Leave to curdle and move to the next step.
3. In a large bowl mix the dry ingredients (flour, cocoa powder, baking powder, baking soda, sugar, salt).
4. Add in the wet ingredients (curdled milk, oil and vanilla) and mix together until combined.
5. Split the mixture between the two cake tins.
6. Bake for 20 minutes. Remove from the oven and leave to sit in the cake tins for 5 minutes. After 5 minutes, remove from the cake tins and leave to cool on a wire rack.

Chocolate cream
1. Use a microwave safe medium size bowl. Break the chocolate into chunks and add it to the bowl with the coconut milk. Heat in the microwave for 30 second intervals and mix with a spoon after every 30 seconds, until melted and combined. It took me about 3-4 30 second intervals. Do not over heat the mixture as the chocolate could burn and that will ruin the cream.
2. Leave the resulting chocolate ganache to cool down completely and set. You could also place it in the fridge to speed up the process.
3. Use a hand/stand mixer to whip the chocolate ganache until it becomes fluffy and light (2-3 minutes).

Buttercream
Sift the icing sugar. Use a hand/stand mixer to cream the Flora buttery with sifted icing sugar and vanilla extract. Mix until pale and fluffy (about 5 minutes on high speed).

Syrup
Mix the cherry brandy and cherry syrup in a jug.

Assembling the cake

1. Remove the pips from 2/3rd of the cherries. Keep the rest of the cherries whole for decoration.
2. Level the sponges by cutting off the domes with a sharp knife. Keep the leftovers for a mini test cake.
3. Put each cream in its own piping bag.
4. Place one chocolate sponge on a plate. Soak the sponge with half of the syrup. Pipe chocolate and butter cream alternating. Top with most of the pitted cherries and keep a few cherries for decoration. Place the second chocolate sponge on top. Soak the sponge with the rest of the syrup. Pipe chocolate and butter cream alternating. Decorate with more cherries. Place the cake in the fridge and remove a couple of hours before serving to bring it to room temperature.
5. Use the leftover sponge, creams and cherries to make yourself a mini cake (for quality testing purposes). You’ve earned it for baking such a wonderful cake for your loved ones 🙂

header
Desserts, vegan

Sweet Potato Brownies (Vegan)

Makes 6 servings

Sweet Potato Brownies

Plant based, decadent & fudgy brownies! This is what dreams are made of.
The secret ingredient? Some of my testers said love (how sweet 🙂 ) and some said cinnamon. You will probably be just as surprised to hear that the secret to fudgy brownies is the humble sweet potato. Trust me on this one, sweet potato in brownies is amazing!
Also teaspoon of espresso powder helps intensify the chocolate flavour, without actually making the brownies taste like coffee.

The recipe is easy, quick and delicious! All you need is a good blender and the brownies will be ready to go in the oven in no time. I added hazel nuts and vegan white chocolate chunks to make it the ultimate sweet treat.
In case you are wondering, I did test making the brownies using less sugar, but I found that they were just not sweet enough for my sweet tooth.

This recipe makes quite a small batch, so make sure to savour every little brownie.
Let me know if anyone guesses the secret ingredient 🙂

P.S. The recipe makes 6 decent size brownies; you don’t have to cut them in such small pieces like I did, but they just look so cute!

Ingredients

  • 400g sweet potatoes
  • 160g sugar
  • 80g coconut oil (melted)
  • 140g vegan dark chocolate (melted)
  • 100g self-raising flour
  • 1 teaspoon espresso powder
  • 1 teaspoon vanilla extract
  • a pinch of salt
  • 50g hazelnuts
  • 50g vegan white chocolate chunks

Method
1. Peel, chop and steam or boil the sweet potato until soft.
2. Line a 20x20cm Pyrex dish with baking parchment. Pre-heat the oven to gas mark 4.
3. In food processor whizz the sweet potato into a puree. Add the sugar, melted coconut oil, melted dark chocolate, self-raising flour, espresso power, vanilla extract and a pinch of salt and whizz until combined. The brownie batter will be quite thick.
4. Mix in the hazelnuts and vegan white chocolate chunks using a spatula.
5. Transfer the brownie in the Pyrex dish and bake for 45-50 minutes. Enjoy hot or cold!

Thanks for the inspiration go to @plantbased.recipes

Sweet Potato Brownies


header

Desserts, vegan

Chocolate orange cheesecake (Vegan)

Makes 10 servings

Chocolate orange cheesecake (Vegan)

Unbelievably rich and creamy chocolate orange ‘cheesecake’.
After my successful classic vanilla baked cheesecake I feel that the sky is the limit (as far as vegan cheesecake goes 😊). I made this new variation for Christmas day lunch and it was very well received!

It is amazing how the texture and taste of this baked no-cheesecake is so much like a traditional cheesecake. Also, unlike traditional cheesecake, this plant based version doesn’t seem to be prone to cracks, so you can have the perfect no-cheesecake every single time.

The flavours I choose this time are crowd pleasers: chocolate and orange.
The crunchy biscuit base is made using Bourbon biscuits (Lidl’s own brand), which are accidentally vegan. Make sure you check the label, as I found that not all brands of Bourbon biscuits are vegan.
I hope you feel inspired to give this amazing cheesecake a try!

Ingredients

Biscuit base

  • 220g vegan Bourbon biscuits
  • 1 tablespoon Flora buttery (melted)

No-cheese cheesecake filling

  • 190g cashew nuts (soaked)
  • 350g firm silken tofu (pressed)
  • 200ml almond milk
  • 100g vegan white chocolate (melted)
  • 2 tablespoons sugar
  • 1/2 lemon (juice)
  • ½ orange (zest & juice)
  • 1 teaspoon vanilla extract

Method

  1. Prep work: soak the cashew nuts in boiling water for a coupe of hours; wrap the tofu in kitchen paper roll and press for a couple of hours.
  2. Preheat the oven to gas mark 4. Use a food processor to pulse the biscuits to a breadcrumb consistency. Pour in the melted Flora and combine. Press the biscuit mixture into the base of a 9 inch/23 cm tart tin.
  3. In a blender, whizz together all the cheesecake ingredients until smooth. The resulting texture should be similar to sour cream and should be pourable. Add more almond milk if the resulting texture is too thick.
  4. Pour the no-cheesecake filling over the biscuit base and bake for 30 minutes. Leave the cheesecake cool down in the oven, with the oven door half open. Once cool, store in the fridge and serve with more orange and chocolate. Enjoy!

Chocolate orange cheesecake (Vegan)

header

Dark Chocolate Banana Muffins
Desserts, vegetarian

Dark Chocolate Banana Muffins

Makes 15 muffins

Dark Chocolate Banana Muffins

Intense dark chocolate muffins, that hide a sweet caramel heart, finished off with peanut butter drizzle.

These muffins are very moist and surprisingly light in texture.
Not only do the muffins taste out of this world, but they are also guilt free!
What makes the muffins guilt free is the low sugar and fat content.  Bananas and Greek yogurt make the muffins super moist and replace the oil or butter in traditional recipes. The sweetness comes mostly from the ripe bananas and honey.

I make these muffins more often than I probably should, but I love to have them as a snack. They are so easy and quick to make; and a healthier alternative to shop bought muffins.

Muffin liner tip: I found that paper liners tend to stick to the muffins, but they are easier to remove once the muffins cool down. Silicone muffin cases don’t stick at all!

Ingredients

  • 3 small ripe bananas
  • ½ cup honey or sugar
  • ¾ cup Greek yogurt
  • 1 egg
  • 2 teaspoons vanilla extract
  • ½ cup whole-wheat flour
  • ½ cup plain four
  • ½ cocoa powder
  • 1 teaspoon baking powder
  • 1 teaspoon bicarbonate of soda
  • 50g dark chocolate (chopped)
  • ¼ cup caramel
  • ¼ cup peanut butter

Method

  1. Preheat the oven to gas mark 5. Line a muffin tin with muffin liners.
  2. In a large bowl, mash the bananas to a smooth paste. Add the honey, Greek yogurt, egg, vanilla extract and mix until combined.
  3. Sift in the flours, cocoa powder, baking powder and bicarbonate of soda. Mix until combined, then fold in the chopped chocolate.
  4. Spoon the batter into the muffin liners, but don’t overfill them. My muffin tin only makes 12 muffins, but I found that dividing the batter between 12 muffins causes them overflow. I use 3 additional silicone muffin cases to make 15 muffins instead.
  5. Spoon caramel in each muffin and try to push it just underneath the surface. Drizzle melted peanut butter.
  6. Bake for 20 minutes on the middle shelf of the oven. Remove from the oven and leave the muffins cool down before trying to remove them from the liners. Enjoy!

Thanks for the inspiration go to Sally’s Baking Addiction

header

Desserts, vegetarian

Chocolate banana bread

Makes 8-10 servings

Chocolate banana bread with caramel drizzle – this is what dreams are made of!

So easy and quick to make, plus you probably already have all the ingredients you need in the house. For me this was an impulse Friday night bake. I’ve been wanting to try this recipe from the Good Housekeeping for a while and I had some over ripe bananas ready to be transformed into a masterpiece! Another impulse decisions was to use a bundt cake tin instead of the loaf tin.

This chocolate banana bread is moist and dense; great served warm with ice-cream and caramel drizzle. Great on its own too! Once I had a slice I couldn’t stop going back for more. I like that you can really taste the banana and that the chocolate is not overpowering.

Top tip for this recipe: use your favourite chocolate chopped instead of chocolate chips. Chocolate chips are usually very high in sugar, so using good quality chocolate instead makes all the difference.

Ingredients

  • 4 small ripe bananas
  • 1 egg
  • 125g melted butter
  • 70g white sugar
  • 70g brown sugar
  • 1 teaspoon vanilla extract
  • 1 teaspoon baking powder
  • 125g flour
  • 50g cocoa powder
  • 40g chopped milk chocolate
  • 40g chopped white chocolate

Serve with caramel sauce and ice-cream.

Method

  1. Preheat the oven to gas mark 4. Coat the bundt tin in butter and flour.
  2. Use a stand mixer with a paddle attachment. Chop the bananas add to the mixing bowl and mix until they turn into a paste. Add the egg and melted butter and mix until combined. Next, add the sugar and vanilla extract and mix until smooth.
  3. Sift over the flour, baking powder and cocoa powder and mix until combined. Fold in the chopped chocolate.
  4. Spoon into the bundt tin and bake for 50-60 minutes (test with a skewer). Cool in the tin for 10 minutes and then transfer to a plate and serve warm, or allow to cool down. Enjoy with caramel sauce and ice-cream!

Thanks for the recipe go to Good Housekeeping.

3-3

header

Desserts, vegetarian

Baked chocolate orange cheesecake

Makes 10-12 servings


A perfectly creamy and zesty cheesecake, with a chocolate biscuit base.
I can’t take credit for this recipe, or for even discovering it, but I am sharing it because it is amazing. My husband came across this delicious recipe in a 2012 Good Housekeeping baking book that his mum passed to us. He baked it for me as a welcome home surprise on my return from Barcelona a few years ago.  I have ever since baked it numerous times for us and family to enjoy.

The original recipe involves making your own biscuits for the biscuit base, but we use Bourbon biscuits instead and it works great. Don’t be tempted to scrape off the cream from the Bourbon biscuits (like my husband did initially :).
The consistency of the raw cheesecake mix will be very runny, but don’t worry, it will set perfectly during baking and while cooling.
The cheesecake is at its best after it has been cooled over night in the fridge, but you can get away with cooling it for a couple of hours in the fridge

Most important of all, I will share the steps to prevent a baked cheesecake from cracking:
1. Once baked, turn off the oven and immediately run a knife around the edge of the cheesecake to help detach it from the tin. The cheesecake will shrink slightly when it cools down, and if the edges are stuck to the tin this will cause it to crack in the middle.
2. Leave the cheesecake cool down in the oven, with the oven door cracked open. This will slow down the cooling and prevent cracks. Also the cheesecake will continue to cook and set.
3. Over baking the cheesecake will also cause it to crack.

Enjoy the perfect cheesecake!


Biscuit base ingredients

  • 400g Bourbon biscuits
  • 50g melted butter

Cheesecake ingredients

  • 800g cream cheese
  • 250g mascarpone
  • 225g sugar
  • 4 eggs
  • 2 tablespoons corn flour
  • 1 teaspoon Vanilla extract
  • 2 oranges (zest and 150ml juice)

Decorations: Terry’s chocolate orange slices and real orange segments.

Method
1. Use a food processor to pulse the Bourbon biscuits to a breadcrumb consistency.  Pour in the melted butter and combine well.  Press the biscuit mixture into the base of a 10 inch cake tin and refrigerate.
2. Pre-heat the oven to gas mark 4.
3. In a large mixing bowl combine all the cheesecake ingredients, except the orange zest and juice. Once all the ingredients are combined, add the orange zest and juice and mix until combined.
4. Pour the cheesecake mix over the biscuit base and bake for 1 hour and 30 minutes on the middle shelf of the oven. When the cheesecake reaches the desired golden colour on top, cover with aluminium foil to prevent it from browning and continue to bake until the time is up.
5. After 1 hour and 30 minutes of baking: turn off the oven, run a knife around the cheesecake edge to help detach from the tin and prevent it from cracking; leave the cheesecake slowly cool down in the oven with the oven door cracked open for 30-60 minutes.
6. Remove from the oven, cool completely at room temperature and chill in the fridge over night, before decorating and serving. Enjoy!

Thanks for the recipe go to the 2012 Good Housekeeping book.

header

Black Forest Cake
Desserts, vegetarian

Black Forest Cake

Makes 10 servings

Black Forest Cake
Black Forest Cake

Juicy cherries, rich chocolate and fluffy Chantilly cream – what a way to impress your guests!

I first made this cake for the birthday of my sister in law this year. It was a surprise birthday cake and I was looking to make a cake that was special, but also a safe choice for all to enjoy.

It also had to be quick and easy to make as I only had the night before to make it, after a long day at work. Although the cake has numerous layers and looks quite impressive, the elements are basic and quick to put together. It’s all about planning! Start by making two chocolate sponge cakes and let them cool down while making the Chocolate Ganache; next make the Chantilly cream, drain the cherries and mix the cherry syrup with Cherry Brandy. Slice the sponge cakes in half and you are all ready to assemble the cake.
Have fun with it!

If you plan ahead, you can spread the work load by making the chocolate sponge cakes the day before (cool and store in an air tight container) and make the rest of the elements on the day.

*Now veganised! New recipe for vegan Black Forest.

Ingredients

Chocolate sponge

  • 1 tablespoon butter & 1 tablespoon flour (to coat the cake tins)
  • 6 eggs
  • 10 tablespoons sugar
  • 5 tablespoons oil
  • 1 teaspoon vanilla extract
  • 6 tablespoons flour
  • 3 tablespoon cocoa powder

Chocolate Ganache

  • 200ml double cream
  • 95g dark chocolate (chopped)
  • 95g milk chocolate (chopped)
  • 15g butter

Chantilly cream

  • 500ml double cream
  • 2.5 tablespoons sugar
  • A few drops of vanilla extract

1 jar Morello cherry compote (400g)
50-100ml Cherry Brandy

Method
1. Preheat the oven to gas mark 6. Coat in butter and flour two 8 inch round cake tins.
2. Separate the egg whites and yolks form 6 eggs. Place the egg whites in a large mixer bowl and mix on high speed until white and fluffy. Add the sugar and mix on high speed until the sugar melts and the egg whites are stiff and shiny. From this point onwards, it is very important not to over mix the cake batter and keep the air in, so I recommend using a balloon whisk. Add the vanilla extract and egg yolks and whisk just enough to incorporate. Sift the flour and cocoa powder and gently incorporate in the cake mix. The resulting consistency should be like a light mousse.
3. Pour half of the cake batter in each cake tin and level. Place both cake tins on the middle shelf of the preheated oven. Bake for 10 minutes at gas mark 6, then reduce the heat to gas mark 5 and bake for another 10 -15 minutes, until the sponges are risen and slightly shrunk away from the edge of the tin. Do not open the oven door before 20 minutes of baking, as this will cause the cakes to collapse.
4. Take the cake tins out of the oven and remove the sponge cakes straight away by turning the tins onto a wooden board. I recommend you use a wood surface or a surface covered with baking parchment, otherwise the cake will stick to the plate or other surfaces while cooling down (so don’t let them cool down in the tin). Once cold, slice each sponge in half using a sharp knife. This should give you four sponge layers to work with.
5. To make the Chocolate Ganache: in a small sauce pan, over low heat, add the double cream and constantly stir until it starts to slightly simmer. Remove from heat. Stir in the roughly chopped chocolate. Slowly stir through the cream until the chocolate melts and forms a Ganache. Mix in the butter and leave the Ganache to cool.
6. To make the Chantilly cream: in a mixing bowl add the double cream, sugar and vanilla extract and whisk until thick.
7. Drain the cherries and save the cherry syrup in a bowl. Mix the cherry syrup with the Cherry Brandy. You will use this syrup to soak the sponges with.
8. You now have all the elements to assemble the cake. Place sponge no. 1 on a cake plate and soak with 1/4th of the cherry syrup. Add 1/4th of the Chantilly cream (you can pipe the cream or use a knife spread over the sponge) and 1/4th of the cherries. Top with sponge no. 2 and soak the sponge no 2. with 1/4th of the cherry syrup, top with  ½ of the Chocolate Ganache, 1/4th of the Chantilly cream and 1/4th of the cherries. Top with sponge no. 3 and repeat. Top with sponge no. 4 and repeat. The end! Enjoy 🙂

Black Forest Cake

header

Banoffee peanut butter cake
Desserts, vegetarian

Banoffee peanut butter cake

Makes 8-10 servings

34-1

Banoffee pie upgraded to a celebration cake!
A winning combination: banana, caramel, whipped cream, peanut butter & chocolate!

My family loves Banoffee pie, but because we were celebrating a birthday and I was feeling creative, I turned it into a celebration cake. The addition of peanut butter was my husband’s idea and it worked great with this cake. To lighten up the cake, I used my fat free super light sponge (my mum’s recipe), which makes it hard for people to stop eating the cake.

Assembling and decorating the cake was so much fun! I would love to see how you decorate this cake.
I hope you enjoy this cake as much as we did!

Ingredients

Vanilla & chocolate sponge

  • 1 tablespoon butter & 1 tablespoon flour (to coat the cake tins)
  • 6 eggs
  • 6 tablespoons sugar
  • 1 teaspoon vanilla extract
  • 6 tablespoons flour
  • 1 tablespoon cocoa powder

Cake fillings

  • 400ml double cream
  • 2 tablespoons sugar
  • A few drops of vanilla extract
  • 4 bananas
  • 1 can caramel (Carnation)
  • 2 teaspoons peanut butter

Decorations

  • Reese’s pieces
  • Chocolate shavings
  • Caramel
  • Whipped cream
  • Banana slices


Method

1. Preheat the oven to gas mark 6. Butter and coat in flour two 8inch round cake tins.
2. Separate the egg whites and yolks form 6 eggs. Place the egg whites in a large mixer bowl and mix on high speed until white and fluffy. Add the sugar and mix on high speed until the sugar melts and the egg whites are stiff and shiny. From this point onwards, it is very important not to over mix the cake batter and keep the air in the mix, so I recommend using a balloon whisk. Add the vanilla extract and egg yolks and whisk just enough to incorporate. Sift the flour and gently incorporate in the cake mix. The resulting consistency should be like a light mousse.
3. Pour half of the cake batter in a cake tin and level. Sift the cocoa powder in the leftover cake batter and gently incorporate. Pour the leftover cake batter in the other cake tin and level. Place both the cake tins on the middle shelf of the preheated oven . Bake for 10 minutes, then reduce the heat to gas mark 5 and bake for another 10 -15 minutes, until the sponges are risen and slightly shrunk away from the edge of the tin. Do not open the oven door before 20 minutes of baking, as this will cause the cakes to collapse.
4. Take the cake tins out of the oven and remove the sponges straight away by turning the tins onto a wooden board. I recommend you use a wood surface or a surface covered with baking parchment, otherwise the cake will stick to the plate or other surfaces while cooling down (so don’t let them cool down in the tin). Once cold, slice each sponge in half using a sharp knife. This should give you four sponge layers to work with (two chocolate and two vanilla).
5. To make the whipped cream, add in a bowl the double cream, sugar and vanilla extract and whisk until thick.
6. Now to the fun part! Get your serving plate/stand ready for assembling and decorating the cake. Peel and chop the bananas in 1cm slices. Set aside for decoration about half of the whipped cream, some caramel and banana slices. Start with a vanilla sponge and layer half of the caramel, peanut butter and banana slices. Add a chocolate sponge on top of this and layer with the whipped cream and more banana slices. Next add the other vanilla sponge on top and layer the left over caramel, peanut butter and banana slices. At last top with the chocolate sponge, decorate and celebrate!

Thanks for the inspiration go my husband!

5

header

Chocolate & chia seeds overnight oats – Vegan
breakfast, Desserts, gluten free, vegan

Chocolate & chia seeds overnight oats – Vegan

Makes 4 servings

3-2

1-3

Superfood, super good! Accidentally vegan & gluten free!

Need I say more? Great for a delicious breakfast or a pick me up snack during the day. Easy to make the night before and quick to put together when hunger strikes and you want to reach for a healthy option.

Chia seeds pack a powerful nutritional punch and are known for numerous health benefits. If you think of incorporating them in your diet this recipe is a good start.
The overnight oats are slow release energy and very filling, so the portion sizes of this recipe are quite small.
Enjoy the guilt free goodness!

Ingredients

Overnight oats

  • 1 cup rolled oats
  • 1 tablespoon chia seeds
  • 1 cup almond milk
  • 1 tablespoon maple syrup
  • 1 tablespoon peanut butter
  • 2 tablespoons cocoa powder

Chia pudding

  • 1 cup almond milk
  • 4 tablespoons chia seeds
  • 1 tablespoon maple syrup
  • A drop of vanilla extract

*berries & raw raw chocolate nibs for serving

Method
1.  Make the overnight oats by mixing all the ingredients in a lidded jar or food container.  Refrigerate for 4 hours or overnight.
2. Make the chia pudding by mixing all the ingredients in a lidded jar or food container. Leave stand for 5 minutes and stir. Refrigerate for 4 hours or overnight.
3. In a glass layer the overnight oats, chia pudding and top with berries and raw chocolate nibs. Enjoy & feel good!

Thanks for the inspiration go to Hannah_chia

header