Lemon semolina cake
Desserts, vegan, vegetarian

Lemon and raspberry semolina cake (Vegan)

Makes 8-10 servings

Lemon semolina cake
Lemon semolina cake


A simple cake with classic flavours. Great for family gatherings or if you just fancy a sweet treat.
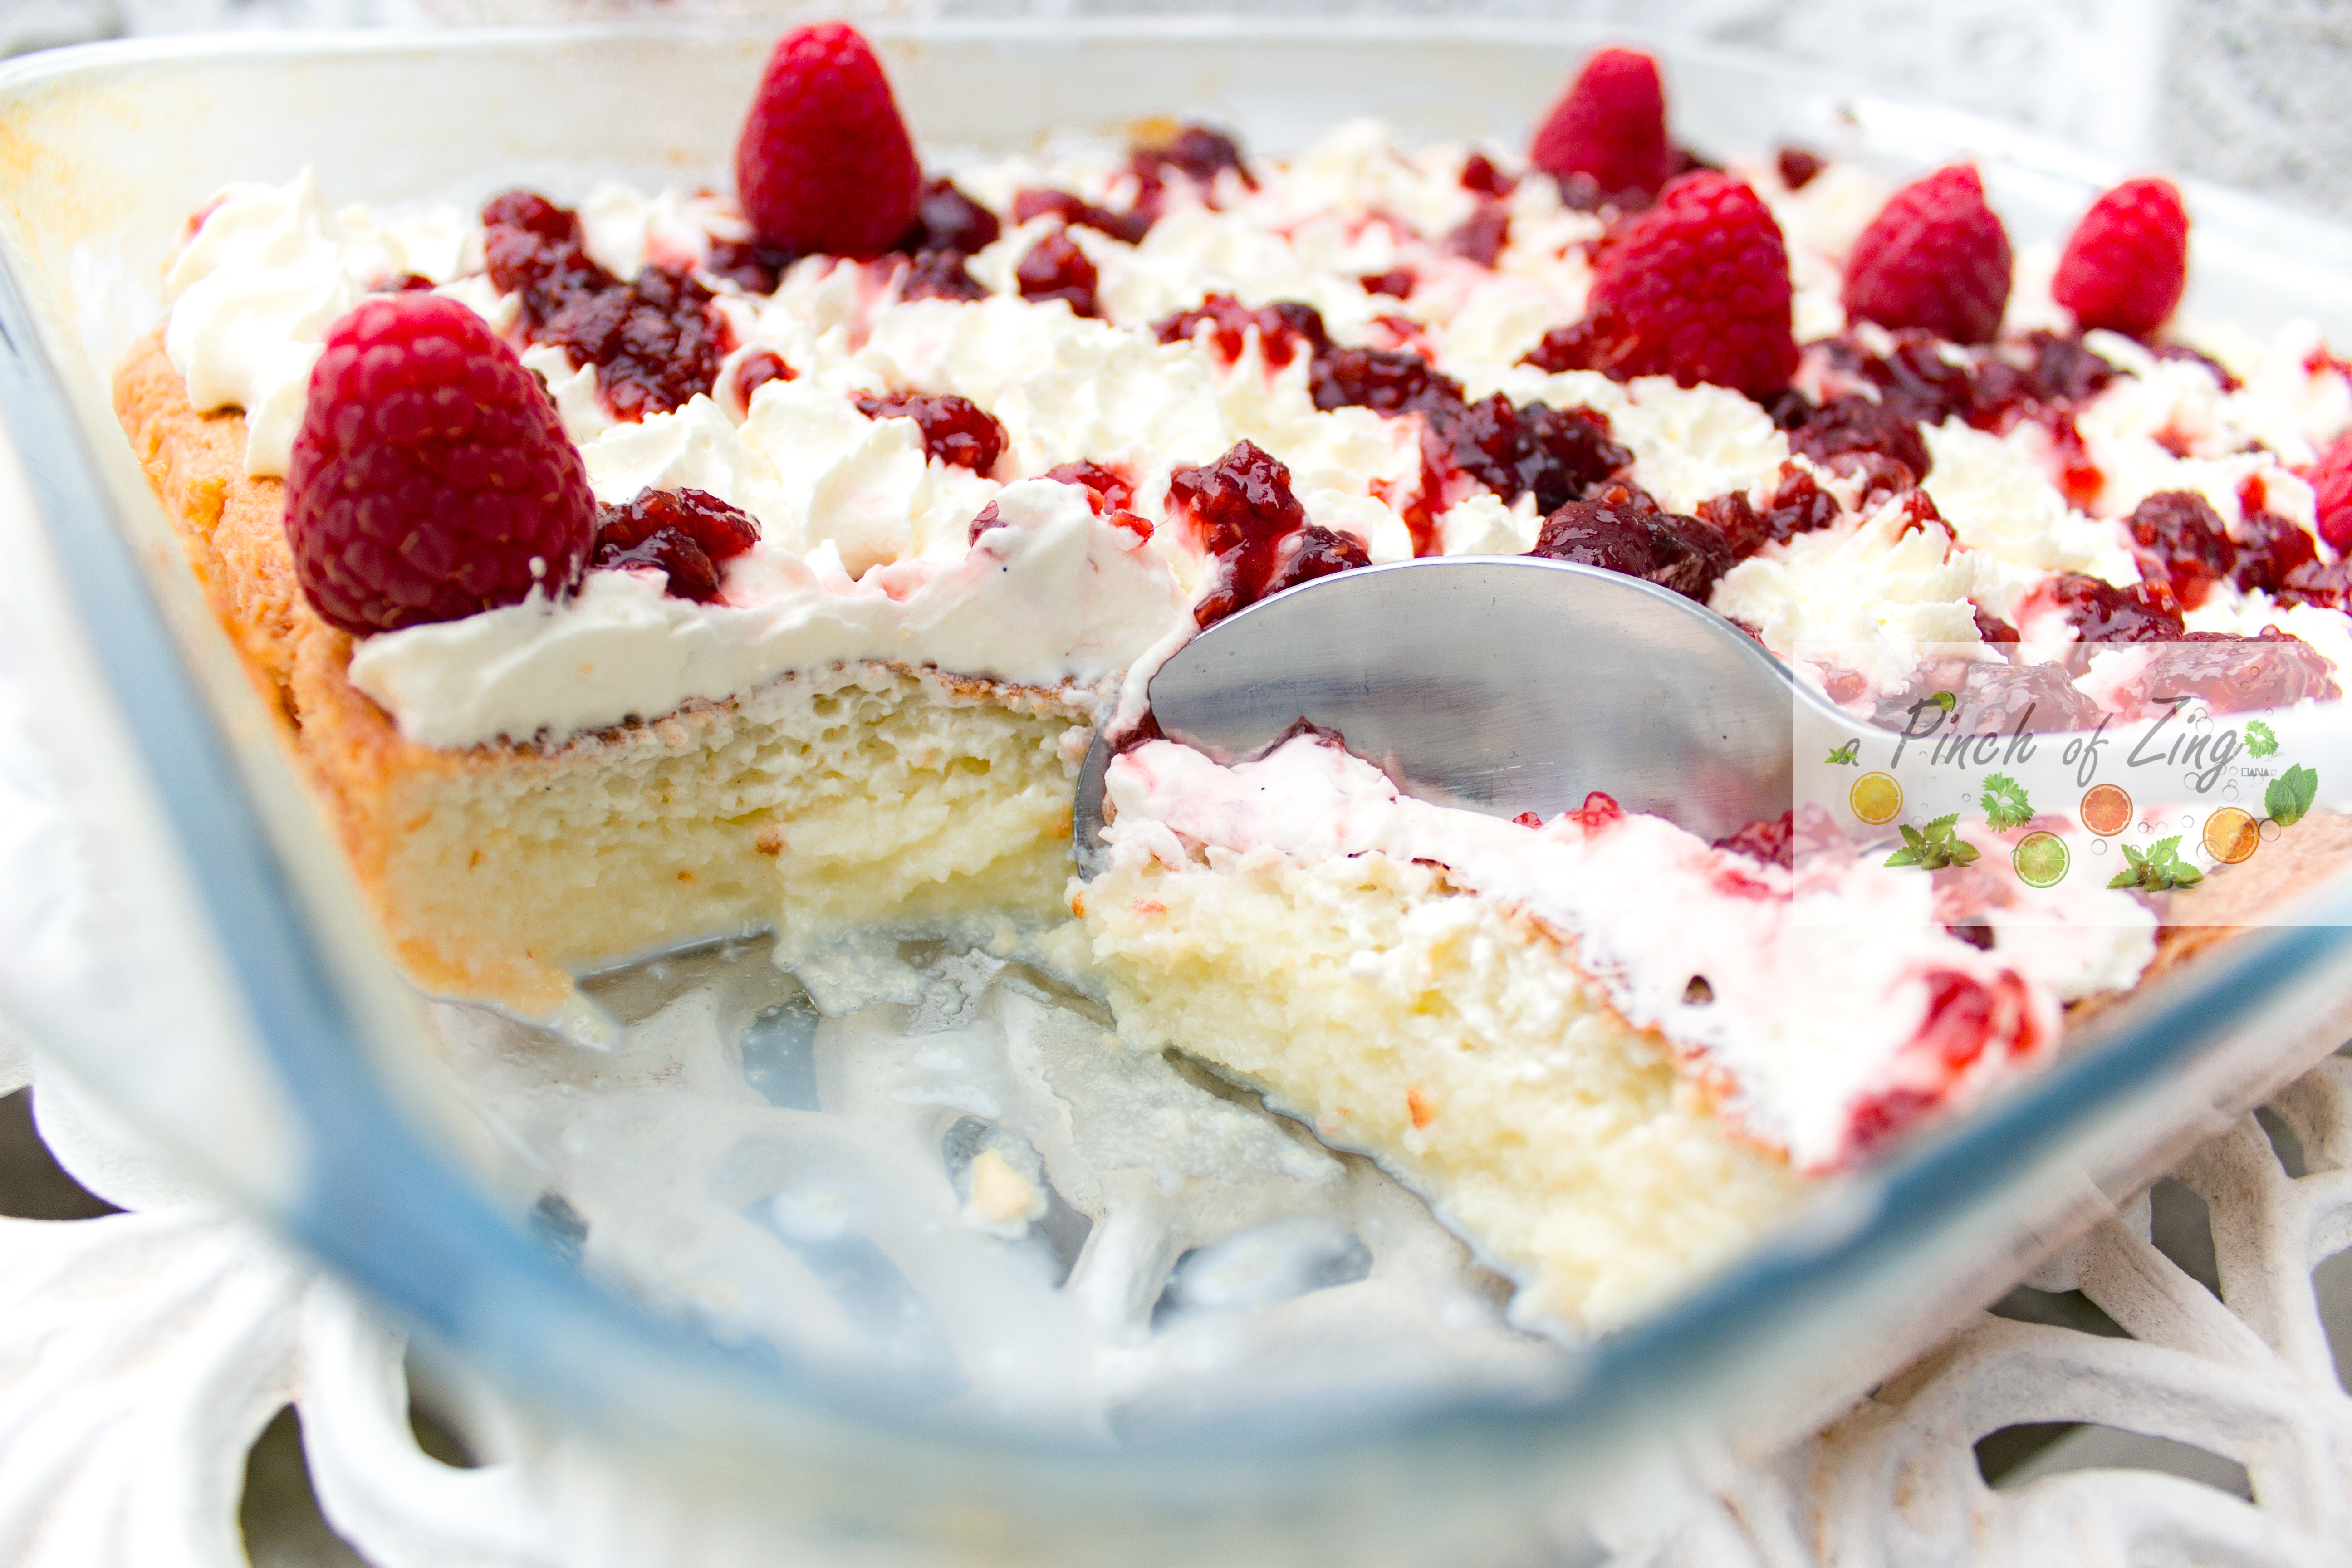
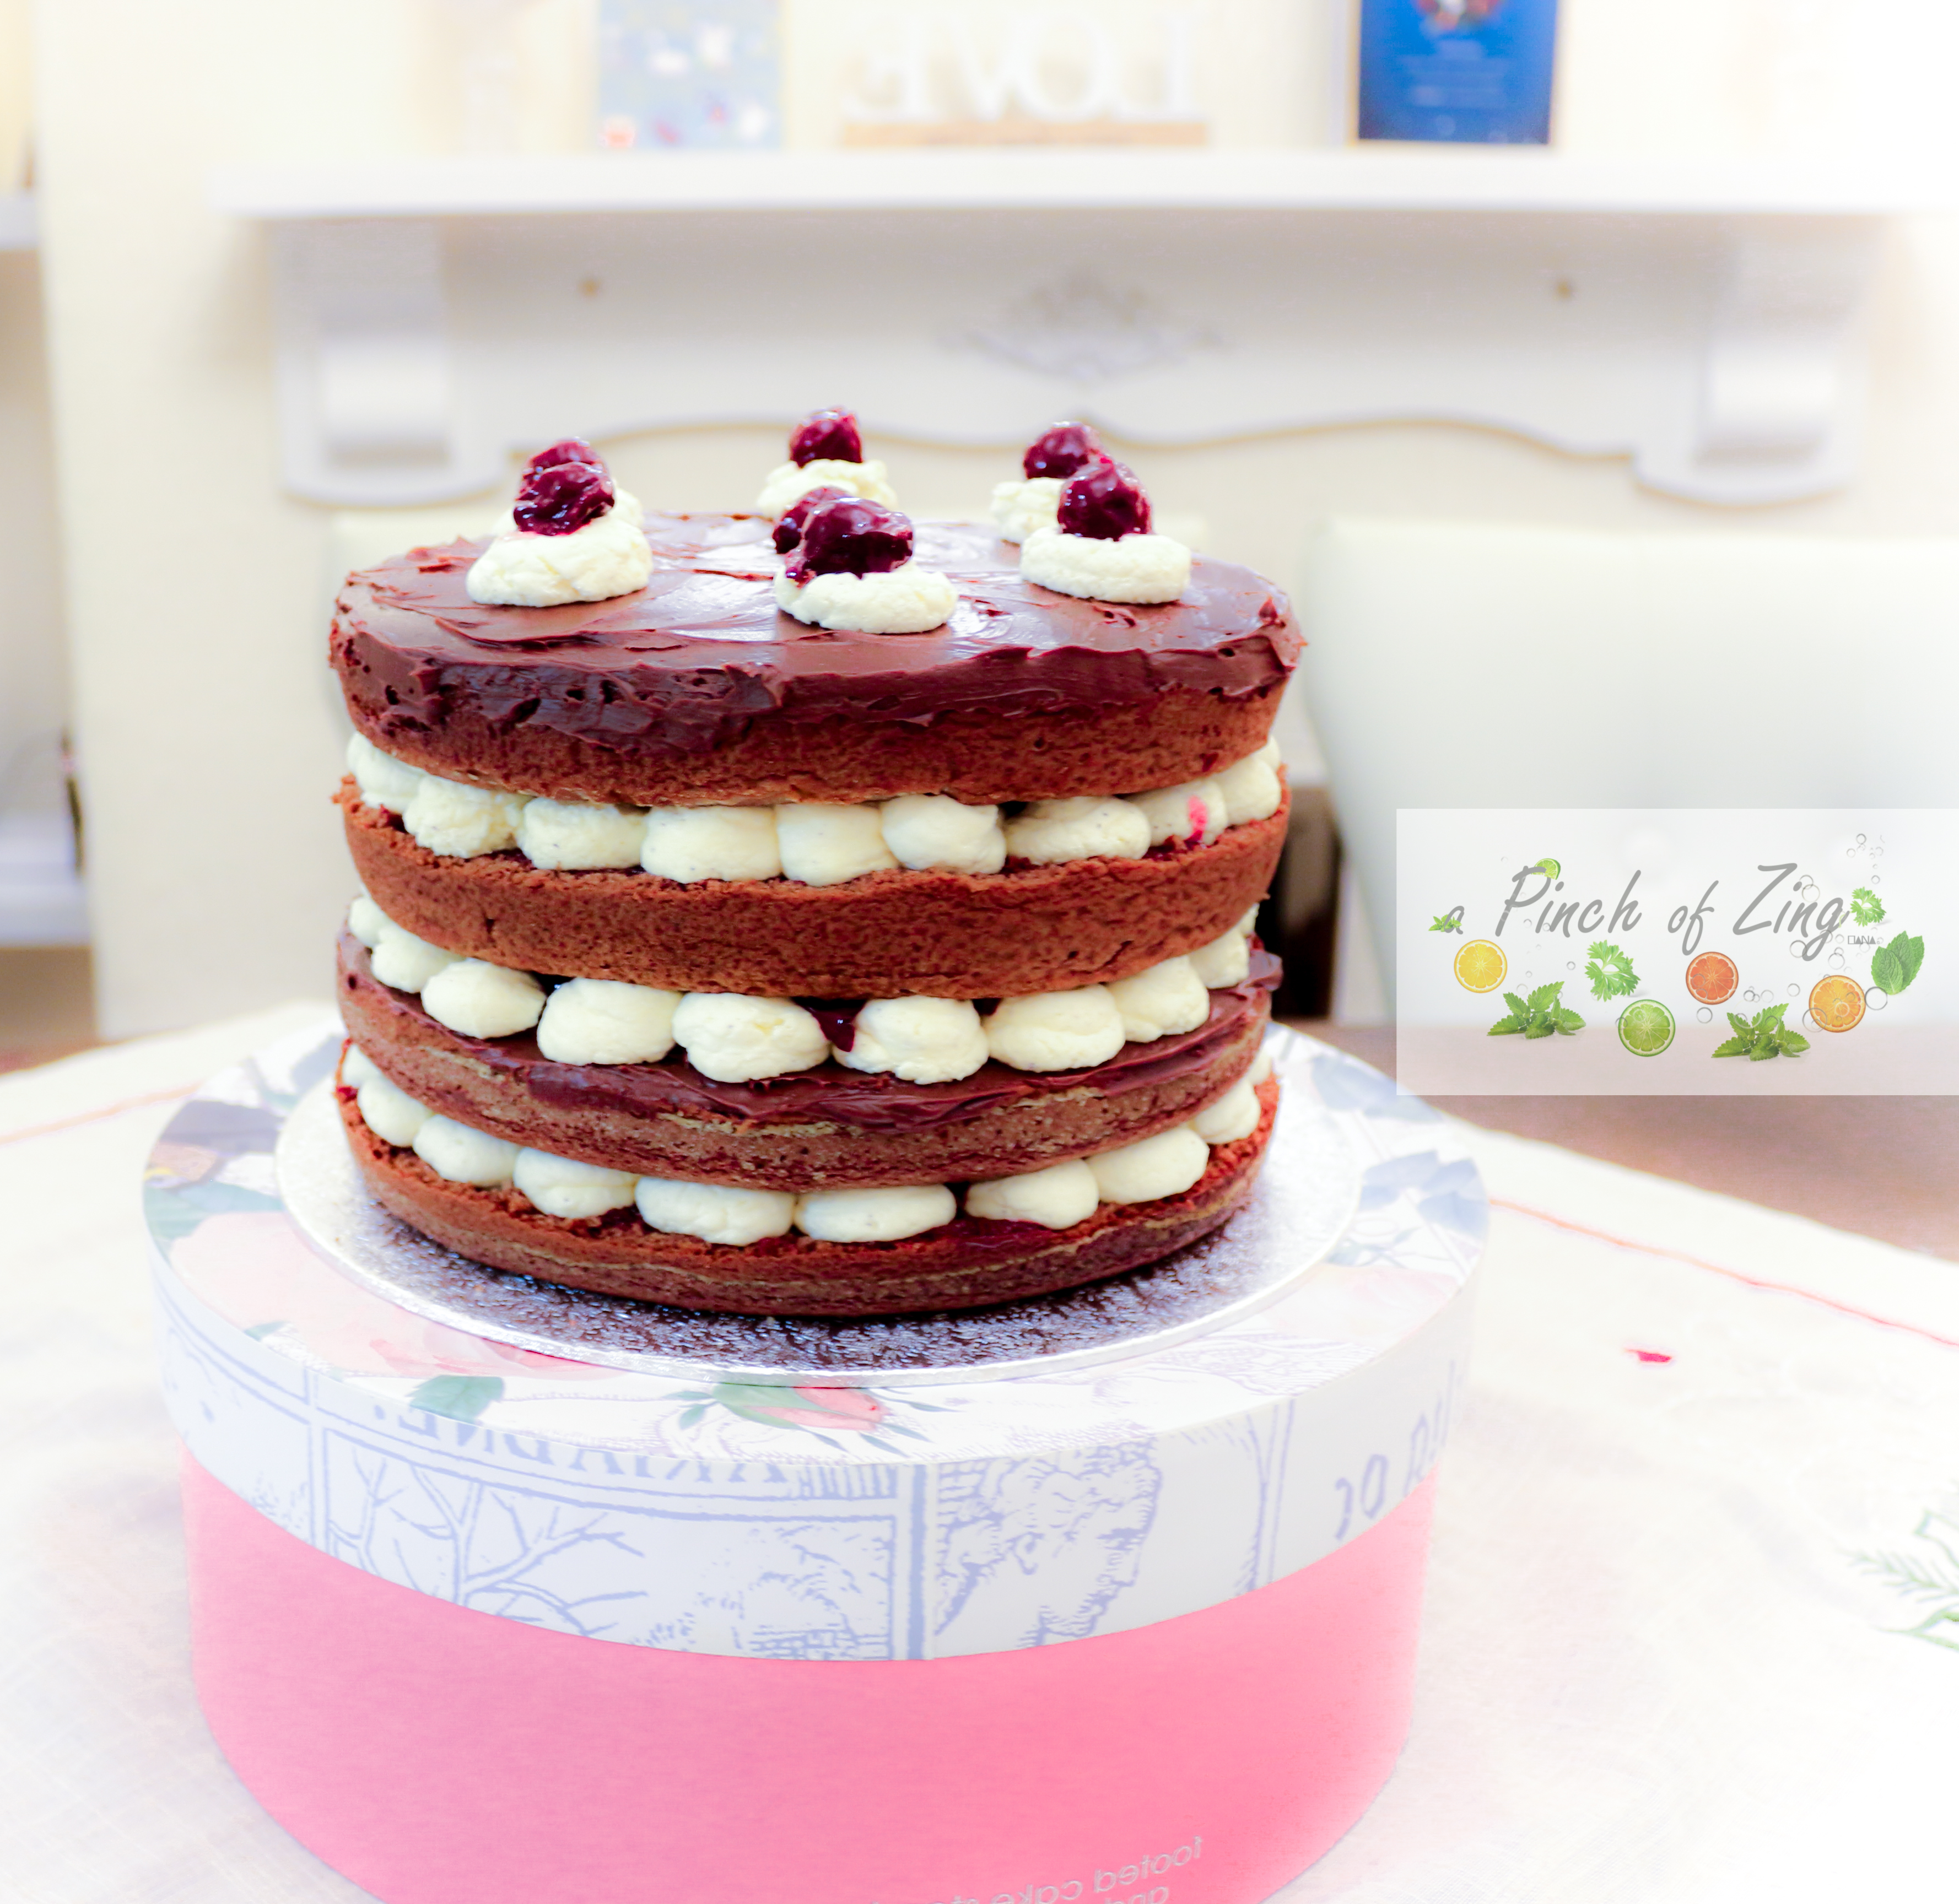
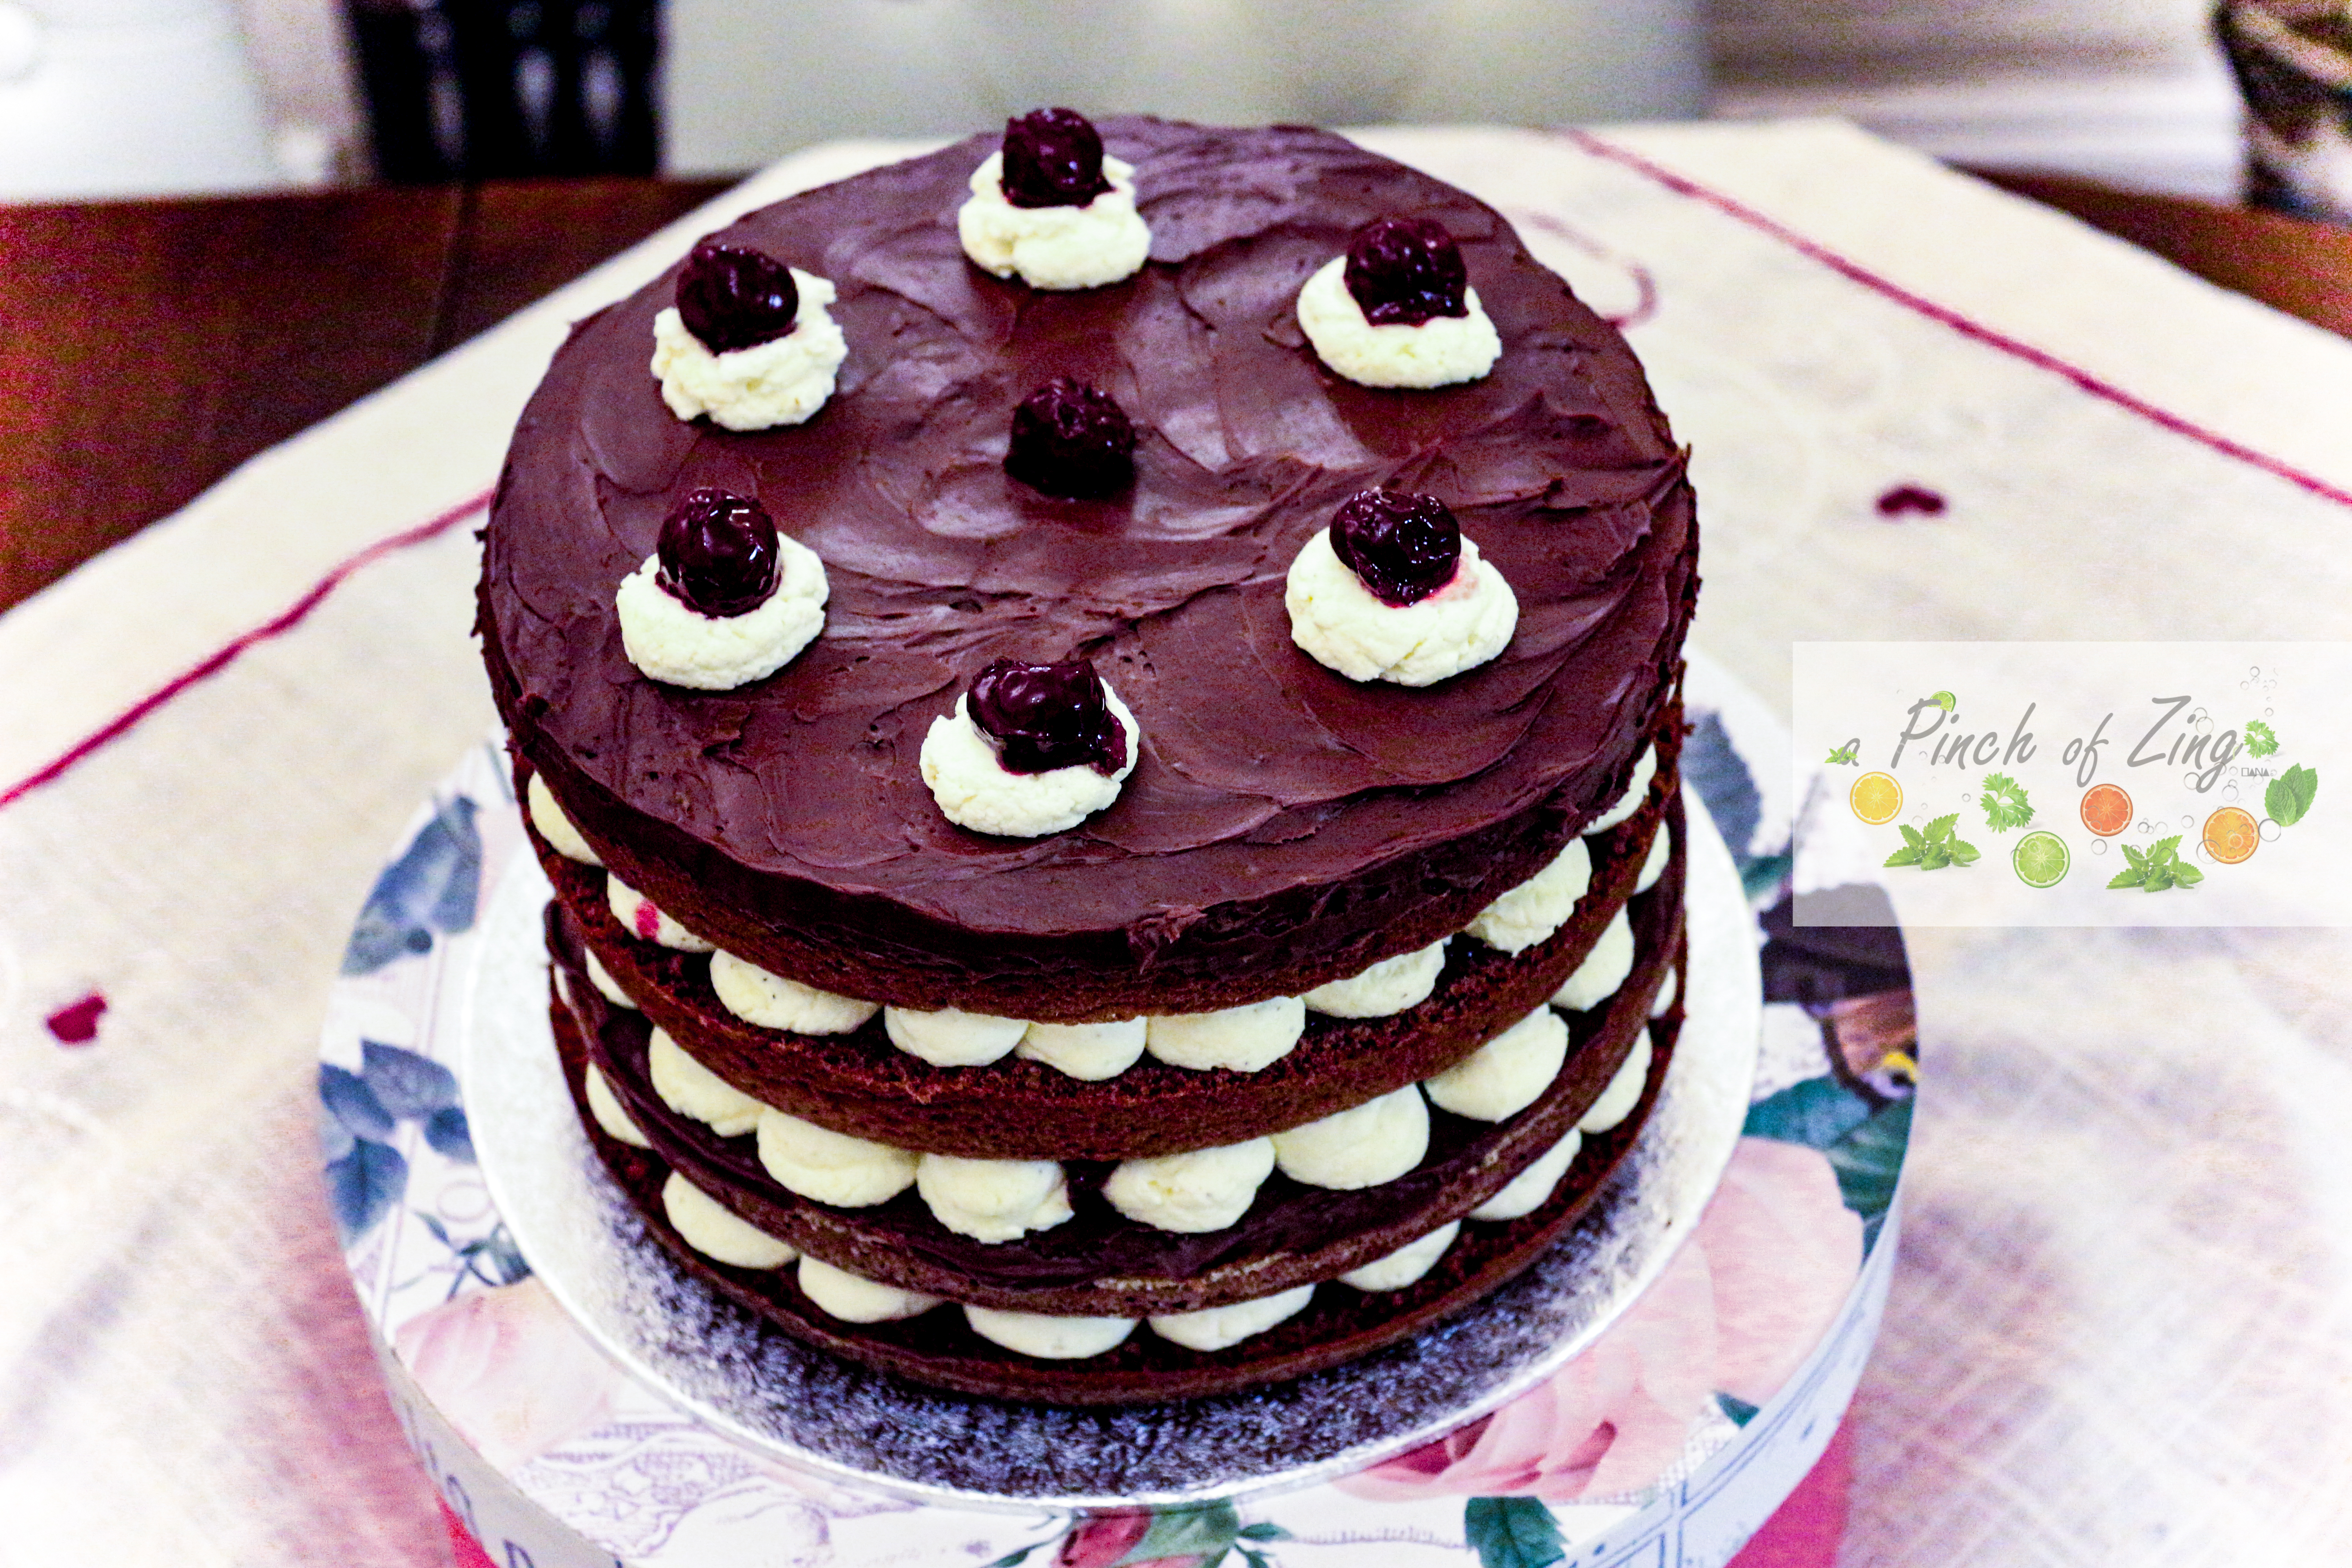
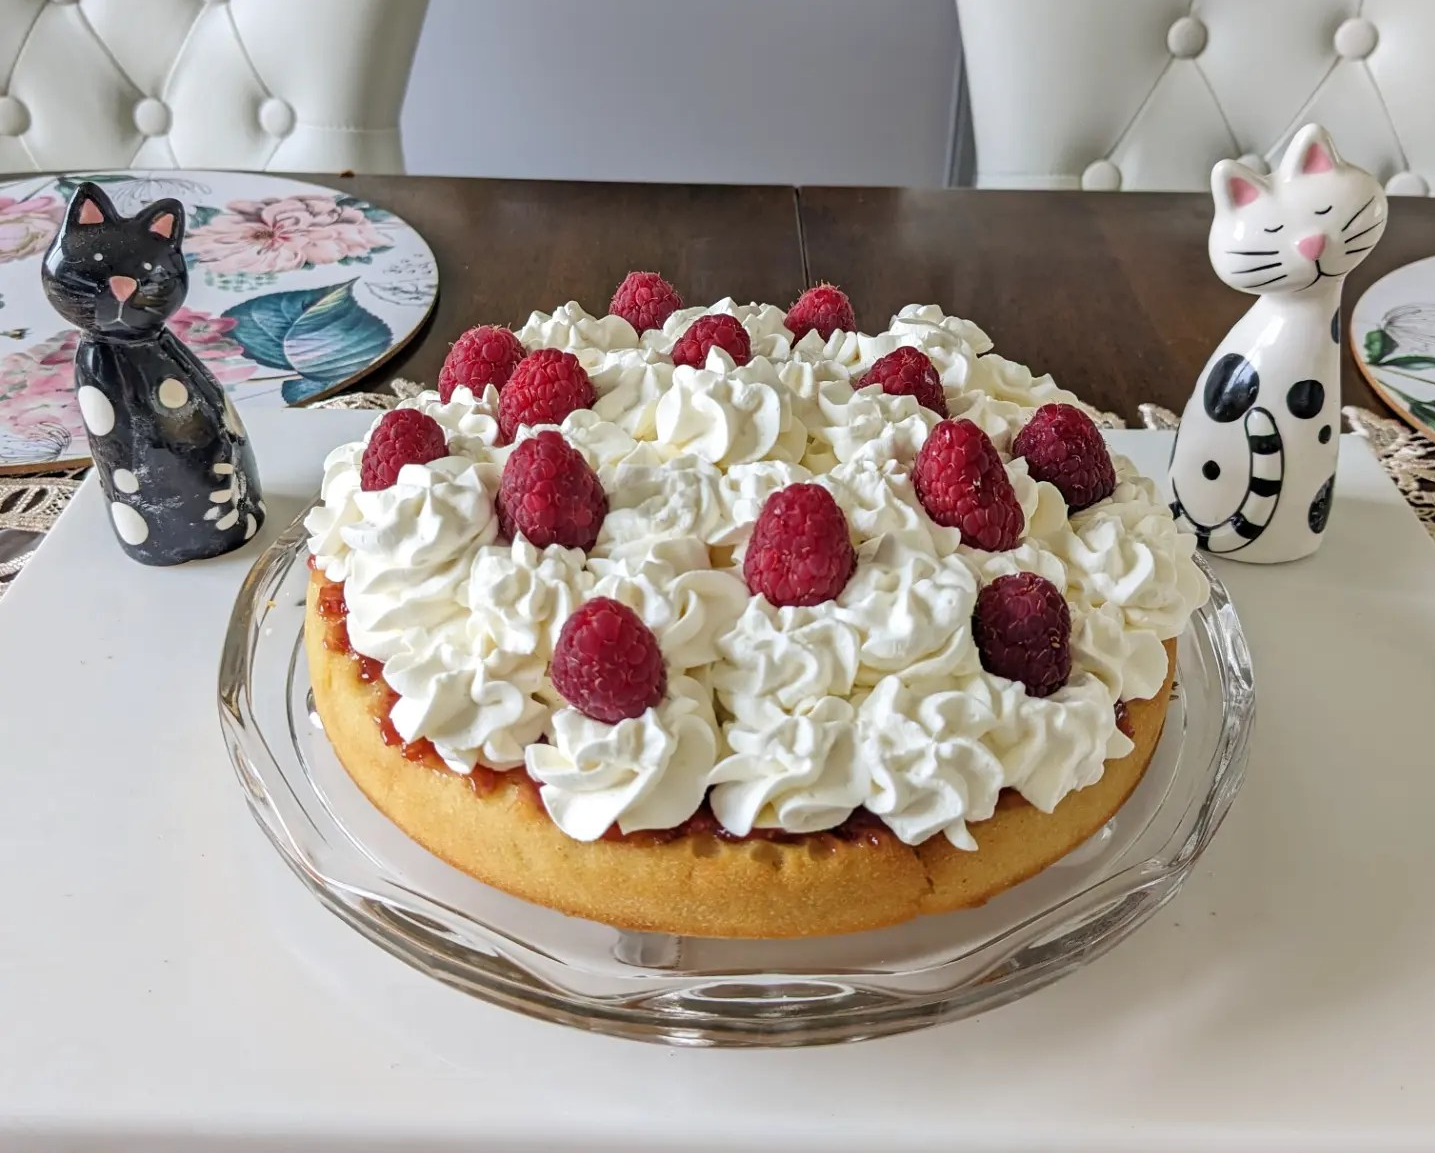
The semolina sponge cake resembles the consistency of a Romanian baked cheesecake (pasca); top it with raspberry jam and whipped cream for an irresistible dessert.  
You could also substitute the raspberry elements with cherry jam and cherries, yum!
Let me know if you try this by tagging @apinchofzing on Instagram.

Ingredients

Sponge cake
100g semolina
100g self raising flour
100g sugar
300ml plain yogurt  (plant based)
75ml oil (rapeseed or sunflower)
1 lemon zested and juiced 
2 teaspoons vanilla extract
1 teaspoon baking powder 

Whipping cream
270ml Elmlea plant double cream
3 tablespoons sugar
1 teaspoon vanilla extract

Fruity element
1/3 jar raspberry/cherry jam
A handful of fresh raspberries
/cherries

Method
1. Preheat the oven to 180C. 
2. To make the sponge, use a large bowl to mix the semolina, flour and sugar. Next, mix in the yogurt, oil, lemon zest and lemon juice. Lastly, mix in the vanilla extract and baking powder. 
3. Pour the cake batter in a 10 inch round cake silicon mould . Place on the middle shelf of the preheated oven and bake for 35 minutes.
4. Take the cake out of the oven, remove from the silicon mould and leave to cool down on a wire rack. 
5. To make the whipping cream, add to a bowl the double cream, sugar and vanilla extract and whisk until thick.
6. Once the sponge cake is cold, top with a layer of jam and pipe the whipping cream on top. Decorate with fresh fruit. Store in the fridge.

Thanks for the recipe inspiration go to Exceedingly Vegan.

header
Milk cake with Chantilly cream and raspberries
Desserts, vegan

Milk cake with Chantilly cream and raspberries (Vegan)

Makes 8 servings

Super moist & light milk cake, with sweet vanilla and vibrant raspberries.
An old fashioned treat that tastes like childhood; definitely worth holding on to!

I wasn’t born vegan, so to keep this cake in my life I had to veganise it. I am very pleased with the result and glad to be able to keep this sweet treat in my life. This cake is great served cold on a hot summer day and you only need a few ingredients to make it.  It is a bit like a trifle in terms of consistency: moist, sweet, creamy, with the added textures of fruit and sponge.

Chantilly cream sounds fancy, but don’t be intimidated, it is whipped cream with sugar and vanilla. You can’t go wrong topping the cake with grandma’s raspberry jam and some fresh raspberries.

Such a simple cake, with classic flavours, that should not be forgotten.

Ingredients

Sponge cake
1 tablespoon vegan spread and 1 tablespoon flour for coating the oven dish
1 cup soy milk
1 teaspoon cider vinegar or lemon juice
2 cups made out of 2 tablespoons fine semolina and the rest plain flour
2 teaspoons baking powder
¼ teaspoon baking soda
½ cup sugar
a pinch of salt
¼ cup + 2 tablespoons rapeseed oil

Milk
1 pint (568ml) hot soy milk
1 tablespoon sugar
1 teaspoon vanilla extract

Chantilly cream
270ml Elmlea plant double cream
3 tablespoons sugar
1 teaspoon vanilla extract

For serving
1 jar raspberry jam
A handful of fresh raspberries

Method
1. Preheat the oven to 190C. Lightly grease and coat in flour a 30cmX23cmX5cm oven proof dish.
2. To make the sponge, mix the soy milk with the the cider vinegar. Leave to curdle and move to the next step.
3. In a large bowl mix the dry ingredients (semolina, flour, baking powder, baking soda, sugar, salt).
4. Add in the wet ingredients (curdled milk, oil and vanilla extract) and gently mix together. Don’t overmix.
5. Pour the cake batter in the ovenproof dish and level. Place on the middle shelf of the preheated oven and bake for 20 minutes.
6. While the cake is baking, heat up the soy milk in a pan with 1 tablespoon of sugar and vanilla extract. Don’t allow the milk to boil, once it starts to shimmer just turn off the flame and set the milk aside.
7. Take the cake out of the oven and while the cake is still hot, pour over the hot milk. The milk will absorb into the cake. Leave the cake to cool down. Cover and chill in the fridge once it’s cold enough to go in the fridge.
8. To make the Chantilly cream, add to a bowl the double cream, sugar and vanilla extract and whisk until thick.
9. Now to the fun part! Decorate the cold milk cake with Chantilly cream, raspberry jam and fresh raspberries. Serve with a large serving spoon in individual bowls. Dig in!

Thanks for the inspiration go our family friend Marcela, who used to make this cake for me as a child.

Milk cake with Chantilly cream and raspberries

header

Vegan tiramisu
Desserts, vegan, vegetarian

Vegan Tiramisu

Makes 6-8 servings

Vegan tiramisu
Vegan tiramisu

My favourite coffee flavoured dessert that instantly cheers me up!
Tiramisu meaning “pick me up” or “cheer me up” is a coffee-flavoured Italian dessert.

Creamy and light, with coffee and Amaretto; it’s the perfect dessert in my books!
Since going vegan, this was one of the sweet treats that I started to miss. What choice did I have? I had to make a vegan version. Successfully veganised!

It wouldn’t have been possible without the vegan Elmlea double cream. I had to go out of my way to get the vegan Elmlea, but it was well worth it. I have since also used it to make banoffee pie and key lime pie. Recipes coming soon, I am running a bit behind. Believe it or not, I cook more than I get to write about on this blog.

I hope this dessert cheers you up!

Ingredients

Cake sponge
125ml almond milk
1/2 teaspoon lemon juice
110g self raising flour
100g sugar
a pinch of salt
3 tablespoons vegetable oil
1 teaspoon vanilla extract

Syrup
100ml strong espresso coffee
100ml Amaretto or Masala wine

Chantilly cream
270ml Elmlea Plant Double Alternative to Dairy Cream
2 tablespoons sugar
A few drops of vanilla extract

1 teaspoon cocoa powder for dusting

Method
1. Preheat the oven to gas mark 4. Butter and coat in flour a 20x20cm Pyrex dish.
2. Warm up the milk in the microwave for 30 seconds and add the lemon juice. Leave to curdle.
3. In a medium bowl mix the flour, sugar and salt. Add the curled milk, oil and vanilla extract. Mix all the ingredients until combined.
4. Pour the cake batter in the greased Pyrex dish and bake for 20 minutes. Allow to cool off.
5. Make the strong espresso coffee and leave to cool off.
6. To make the Chantilly cream, whisk the double cream, sugar and vanilla extract until thick.
7. Soak the cake sponge with the cold coffee and Amaretto. Pipe the Chantilly cream and dust with cocoa powder. Chill in the fridge for a couple of hours before enjoying.

header

Lemon and blueberry cake
Desserts, vegetarian

Lemon and blueberry cake

Makes 10 servings

Lemon and blueberry cake

The lightest lemon cake sponge with sweet Chantilly cream, zesty lemon curd and juicy blueberries!

All you need to do is master the art of making the sponge cake and everything else will fall into place to make this heavenly cake. I made my own Chantilly cream, which is just a fancy way of saying whipped cream, so don’t be intimidated; I used shop bought lemon curd because I didn’t have the time to make my own; and topped it all up with fresh blueberries.  What a great way to get some antioxidants after the Christmas holidays.

The inspiration for this cake was my mother in law, who’s birthday is in January. After all the Christmas chocolate and cakes, this combination felt like a welcome breath of fresh air. Hope you enjoy it as much as we did!

Ingredients

Lemon cake sponge

  • 1 tablespoon butter & 1 tablespoon flour (to coat 2 x 8”cake tins)
  • 6 eggs
  • 10 tablespoons sugar
  • 5 tablespoons oil
  • 1 teaspoon vanilla extract
  • 8 tablespoons flour
  • 1 lemon (zest)

Chantilly cream

  • 500ml double cream
  • 2.5 tablespoons sugar
  • A few drops of vanilla extract

320g lemon curd
200g blueberries

Method
1. Preheat the oven to gas mark 6. Butter and coat in flour two 8inch round cake tins.
2. Separate the egg whites and yolks form 6 eggs. Place the egg whites in a large mixer bowl and mix on high speed until white and fluffy. Add the sugar and mix on high speed until the sugar melts and the egg whites are stiff and shiny. From this point onwards, it is very important not to over mix the cake batter and keep the air in the mix, so I recommend using a balloon whisk. Add the vanilla extract, zest from one lemon, oil and egg yolks and whisk just enough to incorporate. Sift the flour and gently incorporate in the cake mix. The resulting consistency should be like a light mousse.
3. Pour half of the cake batter in each cake tin and level. Place both cake tins on the middle shelf of the preheated oven. Bake for 10 minutes at gas mark 6, then reduce the heat to gas mark 5 and bake for another 10 -12 minutes, until the sponges are risen and slightly shrunk away from the edge of the tin. Do not open the oven door before 20 minutes of baking, as this will cause the cakes to collapse.
4. Take the cake tins out of the oven and remove the sponge cakes straight away by turning the tins onto a wooden board. I recommend you use a wood surface or a surface covered with baking parchment, otherwise the cake will stick to the plate or other surfaces while cooling down (so don’t let them cool down in the tin). Once cold, slice each sponge in half using a sharp knife. This should give you four sponge layers to work with.
5. To make the Chantilly cream, add in a bowl the double cream, sugar and vanilla extract and whisk until thick.
6. Now to the fun part! Get your serving plate/stand ready for assembling and decorating the cake. Start with a sponge and layer with lemon curd, Chantilly cream and blueberries. Top with the next sponge cake and repeat until you have four layers of sponge cake, lemon curd, Chantilly cream and blueberries. Enjoy!

Lemon and blueberry cake

header

Black Forest Cake
Desserts, vegetarian

Black Forest Cake

Makes 10 servings

Black Forest Cake
Black Forest Cake

Juicy cherries, rich chocolate and fluffy Chantilly cream – what a way to impress your guests!

I first made this cake for the birthday of my sister in law this year. It was a surprise birthday cake and I was looking to make a cake that was special, but also a safe choice for all to enjoy.

It also had to be quick and easy to make as I only had the night before to make it, after a long day at work. Although the cake has numerous layers and looks quite impressive, the elements are basic and quick to put together. It’s all about planning! Start by making two chocolate sponge cakes and let them cool down while making the Chocolate Ganache; next make the Chantilly cream, drain the cherries and mix the cherry syrup with Cherry Brandy. Slice the sponge cakes in half and you are all ready to assemble the cake.
Have fun with it!

If you plan ahead, you can spread the work load by making the chocolate sponge cakes the day before (cool and store in an air tight container) and make the rest of the elements on the day.

*Now veganised! New recipe for vegan Black Forest.

Ingredients

Chocolate sponge

  • 1 tablespoon butter & 1 tablespoon flour (to coat the cake tins)
  • 6 eggs
  • 10 tablespoons sugar
  • 5 tablespoons oil
  • 1 teaspoon vanilla extract
  • 6 tablespoons flour
  • 3 tablespoon cocoa powder

Chocolate Ganache

  • 200ml double cream
  • 95g dark chocolate (chopped)
  • 95g milk chocolate (chopped)
  • 15g butter

Chantilly cream

  • 500ml double cream
  • 2.5 tablespoons sugar
  • A few drops of vanilla extract

1 jar Morello cherry compote (400g)
50-100ml Cherry Brandy

Method
1. Preheat the oven to gas mark 6. Coat in butter and flour two 8 inch round cake tins.
2. Separate the egg whites and yolks form 6 eggs. Place the egg whites in a large mixer bowl and mix on high speed until white and fluffy. Add the sugar and mix on high speed until the sugar melts and the egg whites are stiff and shiny. From this point onwards, it is very important not to over mix the cake batter and keep the air in, so I recommend using a balloon whisk. Add the vanilla extract and egg yolks and whisk just enough to incorporate. Sift the flour and cocoa powder and gently incorporate in the cake mix. The resulting consistency should be like a light mousse.
3. Pour half of the cake batter in each cake tin and level. Place both cake tins on the middle shelf of the preheated oven. Bake for 10 minutes at gas mark 6, then reduce the heat to gas mark 5 and bake for another 10 -15 minutes, until the sponges are risen and slightly shrunk away from the edge of the tin. Do not open the oven door before 20 minutes of baking, as this will cause the cakes to collapse.
4. Take the cake tins out of the oven and remove the sponge cakes straight away by turning the tins onto a wooden board. I recommend you use a wood surface or a surface covered with baking parchment, otherwise the cake will stick to the plate or other surfaces while cooling down (so don’t let them cool down in the tin). Once cold, slice each sponge in half using a sharp knife. This should give you four sponge layers to work with.
5. To make the Chocolate Ganache: in a small sauce pan, over low heat, add the double cream and constantly stir until it starts to slightly simmer. Remove from heat. Stir in the roughly chopped chocolate. Slowly stir through the cream until the chocolate melts and forms a Ganache. Mix in the butter and leave the Ganache to cool.
6. To make the Chantilly cream: in a mixing bowl add the double cream, sugar and vanilla extract and whisk until thick.
7. Drain the cherries and save the cherry syrup in a bowl. Mix the cherry syrup with the Cherry Brandy. You will use this syrup to soak the sponges with.
8. You now have all the elements to assemble the cake. Place sponge no. 1 on a cake plate and soak with 1/4th of the cherry syrup. Add 1/4th of the Chantilly cream (you can pipe the cream or use a knife spread over the sponge) and 1/4th of the cherries. Top with sponge no. 2 and soak the sponge no 2. with 1/4th of the cherry syrup, top with  ½ of the Chocolate Ganache, 1/4th of the Chantilly cream and 1/4th of the cherries. Top with sponge no. 3 and repeat. Top with sponge no. 4 and repeat. The end! Enjoy 🙂

Black Forest Cake

header

Orange & poppy seed cake
Desserts, vegetarian

Orange & Poppy Seed Cake

Makes 9 servings

A cake with more than a pinch of zing! Bursting with zesty orange flavour, white chocolate, poppy seeds and Chantilly cream.

A unique combination of flavours and textures that will put a smile on your face.
I made this cake while looking for something more exciting than vanilla and chocolate. Don’t get me wrong, I love vanilla and chocolate, but I was feeling adventurous.

If you are looking for a cake big on flavour, but low in effort, this is the one! Chantilly cream sounds fancy, but don’t be intimidated, it is whipped cream with sugar and vanilla.

Ingredients

Cake

  • 85g butter
  • 225g white chocolate (chopped)
  • 75g sugar
  • 1 orange (50ml juice & zest)
  • 2 eggs
  • 1 teaspoon vanilla extract
  • 220g flour
  • ½ teaspoon baking powder
  • 1 tablespoon poppy seeds

Chantilly cream

  • 200ml double cream
  • 1 tablespoon sugar
  • Vanilla extract

More orange slices and poppy seeds for decorating.

Method
1. Line a 9x9in oven safe dish with baking parchment. Pre-heat the oven to gas mark 5.
2. In small saucepan over low heat, add the butter and stir until melted completely. Add in the sugar and stir for about a 1 minute. Do not allow the mixture to boil. Remove from heat, set aside for 5 minutes to cool down slightly (this will prevent chocolate from burning at next step).
3. Add the chopped chocolate to the butter and sugar mixture and stir until the chocolate is completely melted. No need to place the pan over heat at this stage again, as the residual heat in the butter mixture will be enough to melt the chocolate.
4. Pour the mixture in a large stand mixer bowl. Whisk in the orange juice and zest, then the eggs & vanilla until smooth. Next whisk in the flour, baking powder, and poppy seeds until combined.
5. Pour/scrape the batter in the oven safe dish and bake for 25-30 minutes. Because all ovens are different it’s safe to use the toothpick test to check if the cake is baked. Remove from the oven and leave to cool down.
6. To make the Chantilly cream, add in a bowl the double cream, sugar and vanilla extract and whisk until thick.
7. Now to the fun part: decorate the cake with Chantilly cream, orange slices, poppy seeds and enjoy!

Thanks for the inspiration go to Sally’s baking addiction

header

Milk cake with Chantilly cream and raspberries
Desserts, vegetarian

Milk cake with Chantilly cream and raspberries

Makes 8 servings

Super moist & light milk cake, with sweet vanilla and vibrant raspberries.
An old fashioned treat that tastes like childhood; definitely worth holding on to!

This cake is great served cold on a hot summer day and you only need a few ingredients to make it.  It is a bit like a trifle in terms of consistency: moist, sweet, creamy, with the added textures of fruit and sponge.

The secret of the super light sponge is that it is fat free (no butter, oil or substitutes) and instead of the full amount of flour I used some fine semolina, which helps absorb and hold in the milk for a lovely moist cake.

Chantilly cream sounds fancy, but don’t be intimidated, it is whipped cream with sugar and vanilla. You can’t go wrong topping the cake with grandma’s raspberry jam and some fresh raspberries.

Such a simple cake, with classic flavours, that should not be forgotten.

Ingredients

Sponge cake

  • 4 eggs
  • 5 tablespoons sugar
  • 2 tablespoons flour
  • 2 tablespoons fine semolina
  • Vanilla extract
  • 1 pint (568ml) hot milk

Chantilly cream

  • 300ml double cream
  • 1.5 tablespoons sugar
  • Vanilla extract

For serving

  • 1/3rd jar raspberry jam
  • A handful of fresh raspberries

Method
1. Preheat the oven to gas mark 6. Butter and coat in flour a 30cmX23cmX5cm oven proof dish.
2. Separate the egg whites and yolks. Place the egg whites in a large mixer bowl and mix on high speed until white and fluffy. Add 4 tablespoons sugar and mix on high speed until the sugar melts and the egg whites are stiff and shiny. From this point onwards, it is very important not to over mix the cake batter and keep the air in the mix, so I recommend using a balloon whisk. Add the vanilla extract and egg yolks and whisk just enough to incorporate. Add the semolina and sifted flour and gently incorporate in the cake mix. The resulting consistency should be like a light mousse.
3. Pour the cake batter in the ovenproof dish and level. Place on the middle shelf of the preheated oven. Bake for 5 minutes, then reduce the heat to gas mark 5 and bake for another 20 minutes, until the sponge is risen and slightly shrunk away from the edge of dish. Do not open the oven door before 20 minutes of baking, as this will cause the cakes to collapse.
4. While the cake is baking, heat up the milk in a pan with 1 tablespoon of sugar and vanilla extract. Don’t allow the milk to boil, once it starts to shimmer just turn off the flame and set the milk aside.
5. Take the cake out of the oven and while the cake is still hot, pour over the hot milk. The milk should immediately absorb into the cake. Leave the cake to cool down. Cover and chill in the fridge once it’s cold enough to go in the fridge.
6. To make the Chantilly cream, add in a bowl the double cream, sugar and vanilla extract and whisk until thick.
7. Now to the fun part! Decorate the cold milk cake with Chantilly cream, raspberry jam and fresh raspberries. Serve with a large serving spoon in individual bowls. Dig in!

Thanks for the inspiration go our family friend Marcela, who used to make this cake for me as a child and still does now every time I visit 🙂

header

Banoffee peanut butter cake
Desserts, vegetarian

Banoffee peanut butter cake

Makes 8-10 servings

34-1

Banoffee pie upgraded to a celebration cake!
A winning combination: banana, caramel, whipped cream, peanut butter & chocolate!

My family loves Banoffee pie, but because we were celebrating a birthday and I was feeling creative, I turned it into a celebration cake. The addition of peanut butter was my husband’s idea and it worked great with this cake. To lighten up the cake, I used my fat free super light sponge (my mum’s recipe), which makes it hard for people to stop eating the cake.

Assembling and decorating the cake was so much fun! I would love to see how you decorate this cake.
I hope you enjoy this cake as much as we did!

Ingredients

Vanilla & chocolate sponge

  • 1 tablespoon butter & 1 tablespoon flour (to coat the cake tins)
  • 6 eggs
  • 6 tablespoons sugar
  • 1 teaspoon vanilla extract
  • 6 tablespoons flour
  • 1 tablespoon cocoa powder

Cake fillings

  • 400ml double cream
  • 2 tablespoons sugar
  • A few drops of vanilla extract
  • 4 bananas
  • 1 can caramel (Carnation)
  • 2 teaspoons peanut butter

Decorations

  • Reese’s pieces
  • Chocolate shavings
  • Caramel
  • Whipped cream
  • Banana slices


Method

1. Preheat the oven to gas mark 6. Butter and coat in flour two 8inch round cake tins.
2. Separate the egg whites and yolks form 6 eggs. Place the egg whites in a large mixer bowl and mix on high speed until white and fluffy. Add the sugar and mix on high speed until the sugar melts and the egg whites are stiff and shiny. From this point onwards, it is very important not to over mix the cake batter and keep the air in the mix, so I recommend using a balloon whisk. Add the vanilla extract and egg yolks and whisk just enough to incorporate. Sift the flour and gently incorporate in the cake mix. The resulting consistency should be like a light mousse.
3. Pour half of the cake batter in a cake tin and level. Sift the cocoa powder in the leftover cake batter and gently incorporate. Pour the leftover cake batter in the other cake tin and level. Place both the cake tins on the middle shelf of the preheated oven . Bake for 10 minutes, then reduce the heat to gas mark 5 and bake for another 10 -15 minutes, until the sponges are risen and slightly shrunk away from the edge of the tin. Do not open the oven door before 20 minutes of baking, as this will cause the cakes to collapse.
4. Take the cake tins out of the oven and remove the sponges straight away by turning the tins onto a wooden board. I recommend you use a wood surface or a surface covered with baking parchment, otherwise the cake will stick to the plate or other surfaces while cooling down (so don’t let them cool down in the tin). Once cold, slice each sponge in half using a sharp knife. This should give you four sponge layers to work with (two chocolate and two vanilla).
5. To make the whipped cream, add in a bowl the double cream, sugar and vanilla extract and whisk until thick.
6. Now to the fun part! Get your serving plate/stand ready for assembling and decorating the cake. Peel and chop the bananas in 1cm slices. Set aside for decoration about half of the whipped cream, some caramel and banana slices. Start with a vanilla sponge and layer half of the caramel, peanut butter and banana slices. Add a chocolate sponge on top of this and layer with the whipped cream and more banana slices. Next add the other vanilla sponge on top and layer the left over caramel, peanut butter and banana slices. At last top with the chocolate sponge, decorate and celebrate!

Thanks for the inspiration go my husband!

5

header