dinner, gluten free, lunch, Savoury dishes, vegan

Sushi, Nigri & Tamagoyaki (Vegan)

Makes 3 servings

If you like Shushi, look no further, this is the only recipe you need.
I have done the hard work for you and tried various ratios of sugar, salt and rice vinegar to make the perfect Sushi rice. All is left is for you to have some fun and explore some different variations like Nigri and Tamagoyaki.
What is the secret to a good Sushi? In my experience using special Sushi rice makes all the difference, along with the right seasoning and a bamboo matt to roll the Sushi.
This recipe will make: two Sushi rolls (which cut into slices will make you about 8 pieces of Sushi each), 5 pieces of roasted red pepper Nigri and 5 pieces of tofu Tamagoyaki.
If you only want to make the sushi rolls, that will make 4-5 sushi rolls.
Let me know if you give it a go by tagging @apinchofzing on Instagram.

Ingredients

Sushi rice
250g sushi rice
3 tablespoons rice vinegar
1 teaspoon salt
1 tablespoon sugar

Fillings and toppings
Sushi rolls:2 nori sheets, 1 small carrot, 1 piece of cucumber, 1 piece of avocado and a little bit of Wasabi
Roasted red pepper Nigri: half a nori sheet, half a roasted red pepper in vinegar
Tofu tamagoyaki: half a nori sheet, 100g tofu, turmeric, salt, pepper and oil for frying

Other ingredients for serving
Soy sauce
Wasabi
Toasted sesame seeds
Pickled ginger

Special utensils
Bamboo sushi mat

Method
Step 1. Prepare the rice
Wash the sushi rice in cold water to remove some of the starch.
Soak the sushi rice in cold water for 15-30 minutes. Drain the rice. Add to a pot with 330ml cold water and bring to boil. Once boiling, reduce the heat to low, cover with a lid and simmer for 10 minutes. Turn off the heat and let it sit for 10 minutes with the lid on.
Mix the rice vinegar, salt and sugar to make the Sushi seasoning.
Mix the Sushi seasoning with the Sushi rice and cover the pot with a damp cloth. Leave to cool down a little bit while preparing the fillings and toppings. Don’t take too long as the rice still needs to be warm to handle.

Step 2. Prepare the toppings and fillings
Chop the carrot, cucumber and a avocado into sticks.
Cut the roasted red pepper in small rectangles.
Cut the tofu in small rectangles. Season with salt, pepper and turmeric. Coat in corn flour and shallow fry on both sides until crispy.

Step 3. Assemble the sushi
I will not go into too much detail here, probably best to watch a video on onlie, but here are the basic steps:
1. For Sushi roll 1: lay a nori sheet on the bamboo mat, layer some warm sushi rice, add a small line of Wasabi and layer with 2 carrot stick and 2 cucumber sticks. Roll and cut into slices.
2. For Sushi roll 2: Lay another nori sheet on the bamboo mat, layer some warm sushi rice, add a small line of Wasabi and layer with 2 carrot stick and 2 avocado sticks. Roll and cut into slices.
3. For the roasted red pepper Nigri: cut the nori sheet in 5 strips; wet your hands with water, put about a tablespoon of rice in your palms, squeeze and shape. Place a red pepper rectangle on top. Wrap around with a nori strip.
4. For the tofu Tamagoyaki: cut the nori sheet in 5 strips; wet your hands with water, put about a tablespoon of rice in your palms, squeeze and shape. Place a tofu rectangle on top. Wrap around with a nori strip.

Serve with soy sauce and any of your favourite serving ingredients. Enjoy!

Thanks for the recipe inspiration go to Tim Anderson.

header
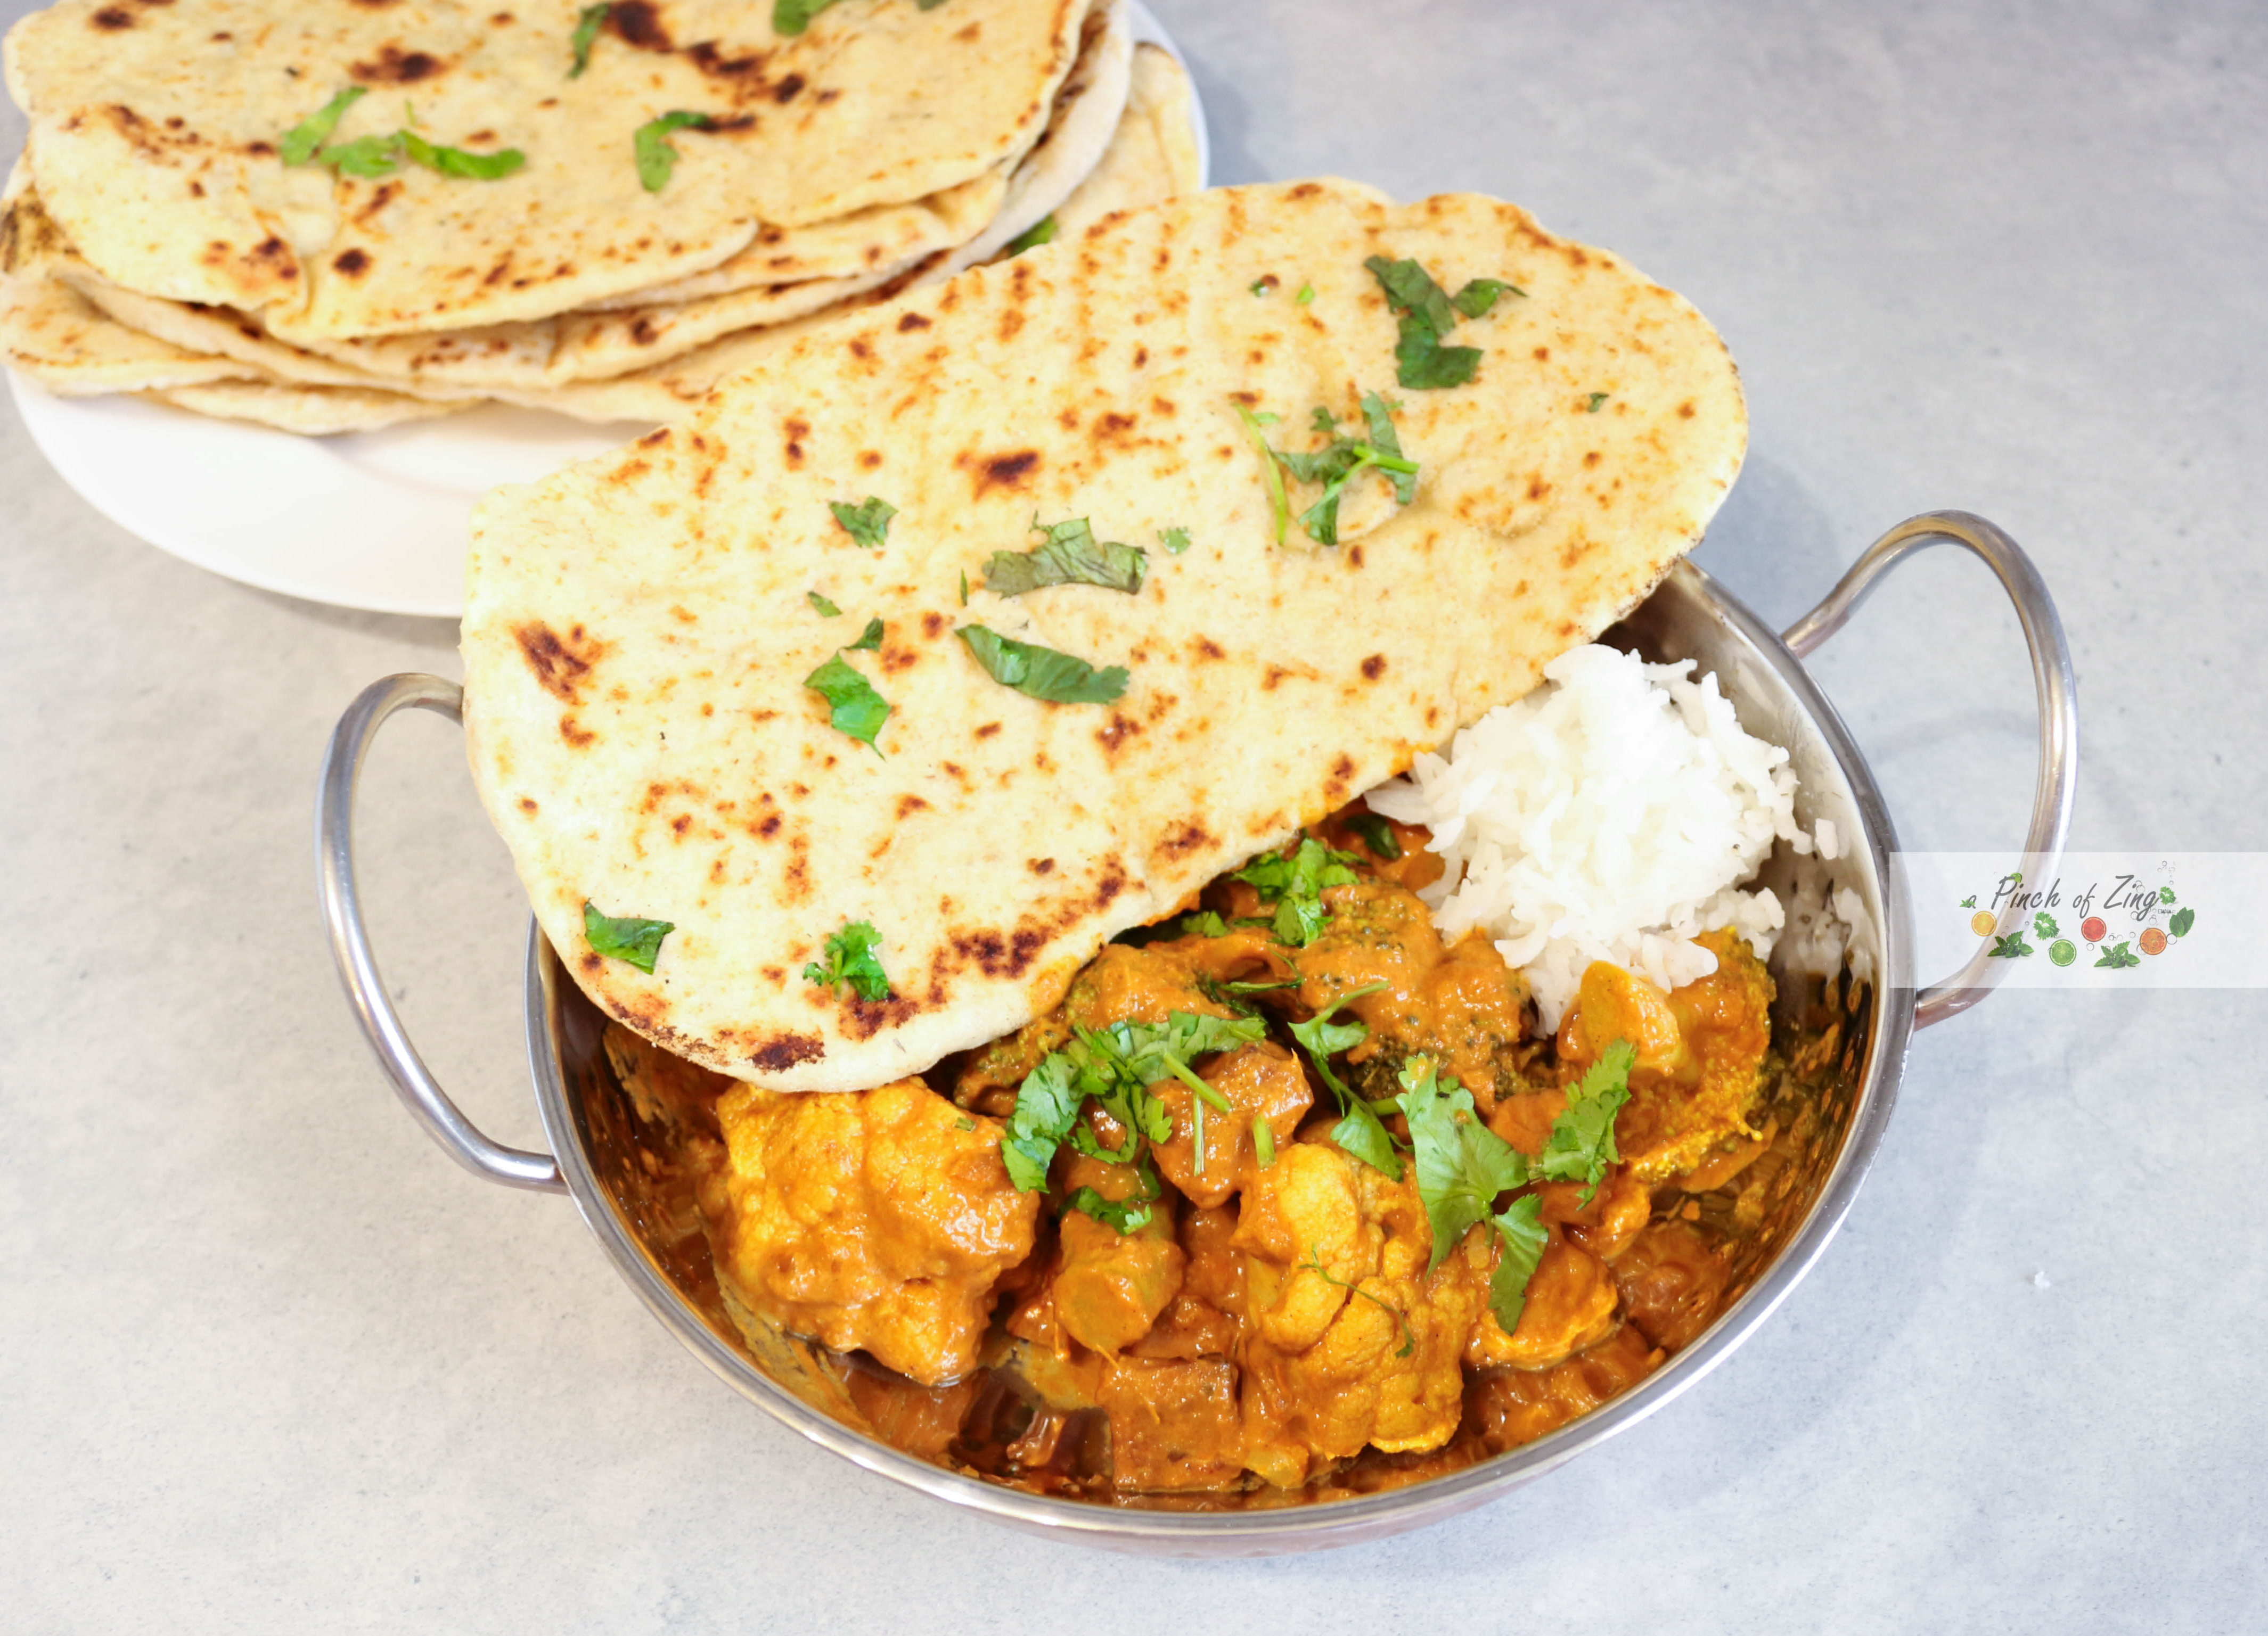
Butter tofu curry (Vegan)
dinner, gluten free, lunch, Savoury dishes, vegan

Butter tofu curry (Vegan)

Makes 4-6 servings

Such a lovely well-balanced curry: fragrant, creamy and not too spicy.
This is one of my favourite Indian curries; I make it all the time, so it’s time it made an appearance on my blog.
This curry is easy to make and packed with veggies. Once you taste this curry you will never use shop bought curry paste again. Great served with rice and naan bread.
If I am entertaining and want to go all out, I will make my own rice and naan bread to go with it, maybe even some Baked onion bhajis.  However, if I am short for time, microwave rice and shop bought naan bread will do the trick.
Let me know if you give it a go by tagging @apinchofzing on Instagram. I hope you enjoy curry night!

Ingredients

Tofu
280g extra firm tofu
1 tsp liquid smoke
3 tbsp soy sauce
½ tsp Cayenne pepper
½ tsp smoked paprika
½ tsp garlic granules

Veggies
1 small broccoli
1 small cauliflower
1 bunch of fresh coriander (chopped)

Butter curry sauce
2 tbsp dairy free butter
1 onion (finely chopped)
1 tbsp tomato puree
2 tsp garam masala
2 tsp ground coriander
2 tsp ground cumin
2 tsp ground turmeric
3 garlic cloves
a thumb size piece of fresh ginger
1 chilli (chopped)
400ml tomato passata
200ml Oatly crème fraiche or Greek yogurt

Method
Step 1. Prepare the tofu.
Press the tofu for at least 30 minutes to drain the excess water or use Tofoo tofu, which is ready to use and doesn’t need pressing. Preheat the oven to 200C. Line a baking tray with parchment. Chop the tofu in bite size cubes and place in a bowl. Add the liquid smoke, soy sauce, spices and mix. Place the tofu cubes in the baking tray and bake for 20 minutes or until golden. 

Step 2. Prep the veggies
Break the cauliflower and broccoli into florets. Add to a pan of boiling water and cook to your liking. You can also steam or roast the veggies if you prefer.

Step 3. Make the butter curry sauce
1. Place a large deep frying pan over medium heat with the butter. When the butter is melted, add the chopped onion and cook until starting to soften (about 5 minutes), stirring occasionally.
2. Add the garlic, ginger and chilli to a food processor with a bit of water and whizz until it turns into a smooth curry paste.
3. Go back to the frying pan and mix in the tomato puree. Add the spices and cook until fragrant (about 2 minutes). Add in the curry paste and cook for 3-5 minutes.  Pour in the passata, bring to a simmer, cover with a lid and cook for 20-30 minutes, but remember to stir occasionally.
4. Stir in the Oatly crème fraiche until combined and remove from heat.
5. Stir in the cooked tofu, broccoli and cauliflower. Garnish with fresh chopped coriander and enjoy with rice and naan bread.

Thanks for the recipe inspiration go to BOSH!

Butter tofu curry (Vegan)
header
American style cookies (Vegan)
Desserts, Snacks / starters, vegan

American style cookies (Vegan)

Makes 12 cookies

American style cookies (Vegan)

The perfect chocolate chip American style cookies!

The recipe is easy, quick and delicious. Perfect for situations when I am pressed for time, but I really need a treat to pick me up.
What’s even better, you can have a fresh batch of cookies in just 20 minutes!
Although incredibly delicious, I have amended the original recipe by reducing the amount of sugar and chocolate in these cookies. I also replaced some of the plain flour with wholegrain and added some mixed seeds. They are cookies, can’t call them healthy, but they are as delicious and as good for you, as cookies will ever be.

No one will ever guess they are vegan! Give them a go and let me know what you think.
If you are looking for a healthier version, check out my Banana and chocolate cookies.

Ingredients

  • 1 tablespoon milled Chia seeds
  • ½ cup Flora buttery
  • 1 cup brown sugar
  • 2 teaspoons vanilla extract
  • 1 cup plain flour
  • ½ cup wholegrain flour
  • 2 teaspoons cornflour
  • 1 teaspoon bicarbonate of soda
  • 2 tablespoons mixed seeds
  • 100g vegan chocolate (chopped)

Method
1. Preheat the oven to 180C and line a baking tray with baking paper.
2. To make the Chia egg, mix the milled Chia seeds with 3 tablespoons of water in a small bowl and leave to set.
3. In a large bowl, cream together the sugar and Flora buttery using a stand or hand mixer. Mix until fluffy, about 3-5 minutes.
4. Add in the Chia seed egg and vanilla extract. Mix until incorporated.
5. Mix in the flours and bicarbonate of soda until combined.
6. Mix in the mixed seeds and chocolate chunks.
7. Use a tablespoon full of batter and shape each cookie into a round ball. Place on the baking tray, leaving plenty of space between the dough balls, as the dough will spread during baking.
8. Bake for 10 minutes, remove from the oven and allow to cool down. The cookies will look under baked to start with, but trust me, they will be perfect once they cool down. Don’t be tempted to over bake them. Enjoy warm or cold.

Thanks for the recipe inspiration go to Nora cooks vegan and Sally’s baking addiction.

header

Pearl barley risotto - Vegan
dinner, gluten free, lunch, Savoury dishes, vegan

Pearl barley risotto – Vegan

Makes 4 servings

1-3

Pearl barley risotto, incredibly creamy and simple to make.
Barley is rich in vitamins and minerals, so I made it easy to include in my diet. Pair this with some steamed broccoli and you have a delicious nutritious meal.
The subtle flavours of lemon, pea, mint and basil make this risotto truly special.

I don’t usually cook with pearl barley, but turns out I rather like it.
Sharing is caring, so don’t miss out on this lovely dish.

Ingredients

  • Oil for frying
  • 1 onion – finely chopped
  • 3 garlic cloves – finely chopped
  • Zest of one lemon
  • 200g pearl barley
  • 1.2l vegetable stock
  • 140g garden peas
  • 1 mint sprig
  • 2 tablespoons Oatly crème fraiche
  • 1 small bunch of basil – finely chopped
  • Salt to taste
  • A head of broccoli (steamed or boiled) for serving

Method

  1. Heat the oil in a medium frying pan over medium heat. Fry the onion, garlic and lemon zest for 5-10 minutes (until soft).
  2. Rinse the pearl barley in cold water to remove some of the starch.
  3. Add the pearl barley to the frying pan and half of the vegetable stock, stirring every few minutes to prevent sticking.
  4. Use half of the garden peas to make a quick pea and mint puree by whizzing peas with 3-4 mint leaves in a blender. Add a splash of water as needed.
  5. Once the pearl barley stock is absorbed, stir in the leftover vegetable stock, the leftover the garden peas, pea puree and continue to cook until the liquid is absorbed.
  6. Remove from heat and stir in the Oatly crème fraiche and basil. Add salt to taste (my vegetable stock is already salty, so I don’t usually have to add more salt).
  7. Enjoy with steamed broccoli.
header
Overnight oats vegan
breakfast, Desserts, gluten free, vegan

Overnight oats with Chia seeds- Vegan

Makes 1-2 servings

Overnight oats - vegan
Overnight oats – vegan

Superfood, super good! Accidentally vegan & gluten free!

Need I say more? Great for a delicious breakfast or a pick me up snack during the day. Easy to make the night before and quick to put together when hunger strikes and you want to reach for a healthy option.

Chia seeds pack a powerful nutritional punch and are known for numerous health benefits. If you think of incorporating them in your diet this recipe is a good start.
The overnight oats are slow release energy and very filling. The combination of banana, blueberries and peanut butter is one of my favourites. You may also like my overnight oats with Chia seed pudding
Enjoy the guilt free goodness!

Ingredients

Overnight oats
1 cup rolled oats
1 tablespoon chia seeds
1 cup plant milk

For serving
one banana
a handful of blueberries
1 teaspoon melted peanut butter 

Method
1.  Make the overnight oats by mixing all the ingredients in a lidded jar or food container.  Refrigerate for 4 hours or overnight.
2. Top with banana slices, berries and peanut butter. Enjoy & feel good!

4

header

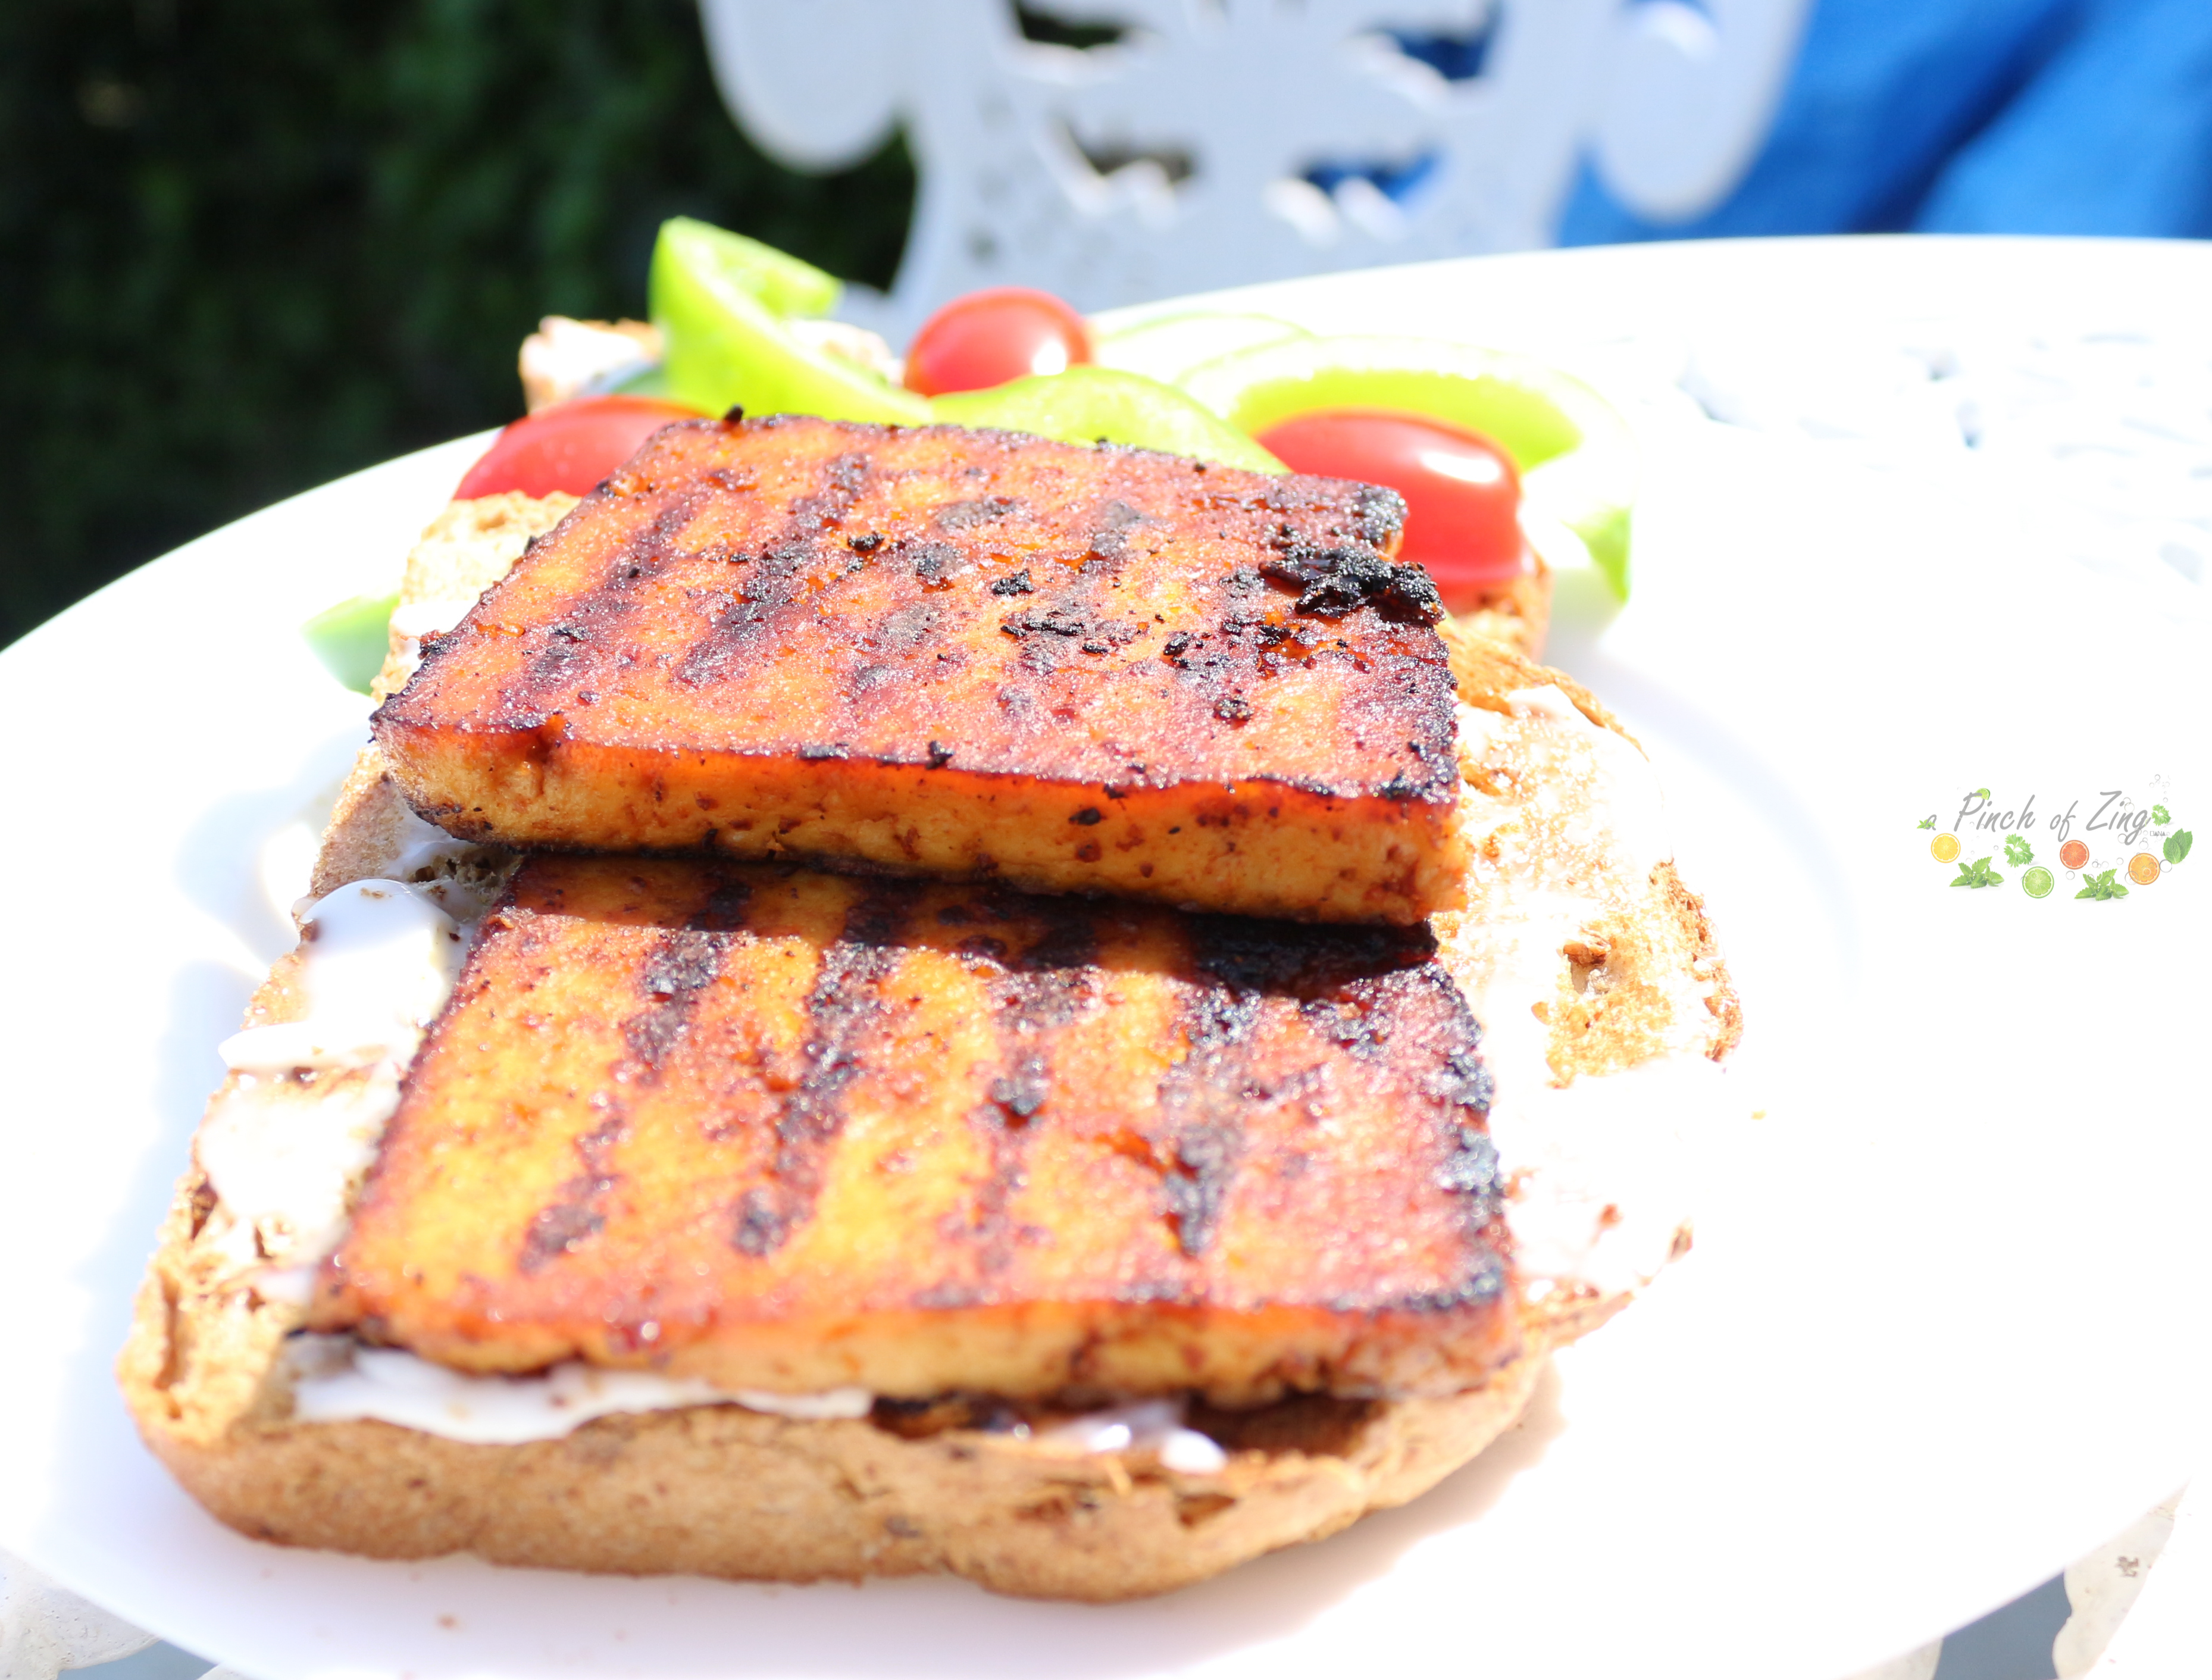
Tofu bacon (vegan)
breakfast, lunch, Savoury dishes, vegan

Tofu bacon (Vegan)

Makes 7 slices

4-2

Lunch just got better! It’s never been easier to make to make a decent vegan sandwich.

I used to find cooking tofu challenging, but with some practice I mastered it.
Top tip: you need big bold flavours because tofu itself is a blank canvas.
Also I love the Tofoo Co Naked Tofu because it doesn’t need to be pressed for hours before cooking and has great taste and texture.
I like my tofu baked or fried. This recipe involves frying it in a griddle pan, but you can find my recipe for baked tofu in the Yasai Samla Curry recipe.
You can also bake the tofu bacon instead of frying it. You will need to give it 20-30 minutes in the oven at 200C.
Have a great lunch break!

Ingredients

  • 280g extra firm tofu
  • 1 tablespoon agave syrup or maple syrup
  • 2 tablespoons soy sauce
  • 1 teaspoon chipotle pepper paste
  • ½ teaspoon smoked paprika
  • ½ teaspoon garlic granules

Method

  1. Drain the tofu and use paper kitchen towels to absorb extra moisture.
  2. Slice the tofu and use paper kitchen towels to absorb extra moisture from each slice.
  3. Mix all the ingredients to make the marinade. Place the marinade and tofu slices in a shallow dish and leave to marinate for 10 minutes. Turn the tofu slices and marinate for another 10 minutes on the other side. Feel free to marinate for longer if you have the time.
  4. Heat a griddle pan and fry the tofu slices with the leftover marinade for 5 minutes on each side, until crispy and golden.
  5. Use the tofu to make a sandwich with your favourite bread, vegan mayo and veggies. Enjoy!

Tofu Bacon (Vegan)

Tofu Bacon (Vegan)

header

Vegan spaghetti Bolognese
dinner, lunch, Savoury dishes, vegan

Vegan spaghetti Bolognese

Makes 7 servings

Vegan spaghetti Bolognese

Comfort food at its best. Rich Bolognese sauce with spaghetti and Parmesan. Simply delicious.
Another crowd pleaser, everyone will enjoy a big pile of spaghetti Bolognese topped with Parmesan. Expect empty plates all around.
To get to this recipe I veganised ‘The best spaghetti Bolognese recipe’ from BBC Good Food and I can confirm it is THE BEST.
I like that the recipe is using simple ingredients that come together into an amazing dish. I got the Soya Protein from Holland and Barrett a while ago, so I was keen to actually use it.
The prep doesn’t take long, but you need to cook the sauce for an hour, so factor that in, but it’s definitely worth while.
Use some good quality pasta and you have a winning dinner. Enjoy!

Ingredients

  • 1 cup Soya Protein Mince
  • 3 cups hot water
  • Oil for frying
  • 2 onions – finely chopped
  • 2 garlic cloves – finely chopped
  • 1 red chilli, deseeded and finely chopped
  • 2 carrots – finely grated
  • 2 celery sticks – finely chopped
  • 3 sprigs rosemary – leaves picked and finely chopped
  • 2 x 400g tins plum tomatoes
  • 1 bunch of fresh basil – finely chopped
  • 1 teaspoon dried oregano
  • 2 fresh bay leaves
  • 2 tablespoons tomato purée
  • 1 vegetable stock cube
  • 125ml red wine
  • 6 cherry tomatoes, sliced in half
  • Salt & pepper to taste
  • 75g vegan Parmesan – grated
  • 500g spaghetti

For serving: garlic bread, more Parmesan and chopped basil

Method

  1. Rehydrate the soy protein by adding 1 cup of Soya Protein Mince in a large bowl and 3 cups of hot water. Leave to soak while you prepare the rest of the ingredients.
  2. In a large frying pan heat the oil and fry the chopped onions and garlic on medium heat for about 5 minutes (until soften). As you go prep and add the chilli, carrots, celery and rosemary. Stir often and cook for 5-10 minutes until soften.
  3. Drain any excess water from the Soya Protein Mince and add to the frying pan. Fry for about 5 minutes.
  4. Add the plum tomatoes, basil, oregano, bay leaves, tomato purée, vegetable stock cube, red wine and cherry tomatoes. Stir with a wooden spoon, breaking up the plum tomatoes. Bring the sauce to boil, reduce the heat to low and cover with a lid. Cook for an hour, stirring occasionally, until you have a thick rich sauce.
  5. Add the grated parmesan and check the seasoning. Add salt and pepper to taste.
  6. Cook the spaghetti following the instructions on the pack, drain and stir in the sauce.
  7. Enjoy with or without garlic bread, more parmesan and fresh basil.

Thanks for the inspiration go to BBC Good Food.

header

Jackfruit toastie
breakfast, dinner, gluten free, lunch, Savoury dishes, vegan

Jackfruit toastie (Vegan)

Makes 4 toasties

Jackfruit toastie
Jackfruit toastie

Easy to make and absolutely scrumptious.
Smoky BBQ Jackfruit with ooey gooey vegan cheese, beyond yum!

I have been trying Jackfruit when eating out and sometimes was better than other times, so I was undecided about it. When I saw cans of Jackfruit in the supermarket (I found it in Sainsbury’s) I thought I’d give it a go at cooking it myself. I am so glad I did!
Cooking it to my liking helped me decide I rather like Jackfruit.
I love using it in toasties, but I have also used it in pulled pork like burgers.

To give it the rich smoky flavour I used a vegan BBQ sauce I found in Lidl, but be sure to check the ingredients as not all BBQ sauce is vegan. The recipe is enough to make four toasties, but it really depends how deep fill you like your toasties 😊
You can cook the Jackfruit ahead, keep it in the fridge and have it as a sandwich filling any day of the week. Breakfast, brunch, lunch? There’s always a good time to have a Jackfruit toastie.
Are you a Jackfruit lover?

Ingredients

  • Oil for frying
  • 1 red onion – finely chopped
  • 1 tablespoon tomato puree
  • 1 can young jackfruit in water (400g can)
  • 1/3 teaspoon garlic powder
  • 1/3 teaspoon paprika
  • 1/3 teaspoon cayenne pepper
  • 125g BBQ sauce (vegan)
  • Salt & pepper to taste
  • Bread slices
  • Violife cheese slices

Method

  1. In a frying pan heat the oil and fry the chopped onion on medium heat for about 5 minutes (until soften). Add the tomato puree and mix.
  2. Drain the Jackfruit out of the tin and use paper kitchen towels to press it and get some more of the moisture out.
  3. Season the Jackfruit with the garlic powder, paprika and cayenne pepper and add to the frying pan. Cook for about 10 minutes. Add the BBQ sauce and cook for another 10 minutes before removing form heat.
  4. You are now ready to create your toastie. Use two slices of your favourite bread, layer each with a slice of Violife and some Jackfruit. Toast for about 5 minutes, until the cheese is gooey!
    Enjoy with a side of salad, slaw or baked beans.

header

Desserts, vegan

Sweet Potato Brownies (Vegan)

Makes 6 servings

Sweet Potato Brownies

Plant based, decadent & fudgy brownies! This is what dreams are made of.
The secret ingredient? Some of my testers said love (how sweet 🙂 ) and some said cinnamon. You will probably be just as surprised to hear that the secret to fudgy brownies is the humble sweet potato. Trust me on this one, sweet potato in brownies is amazing!
Also teaspoon of espresso powder helps intensify the chocolate flavour, without actually making the brownies taste like coffee.

The recipe is easy, quick and delicious! All you need is a good blender and the brownies will be ready to go in the oven in no time. I added hazel nuts and vegan white chocolate chunks to make it the ultimate sweet treat.
In case you are wondering, I did test making the brownies using less sugar, but I found that they were just not sweet enough for my sweet tooth.

This recipe makes quite a small batch, so make sure to savour every little brownie.
Let me know if anyone guesses the secret ingredient 🙂

P.S. The recipe makes 6 decent size brownies; you don’t have to cut them in such small pieces like I did, but they just look so cute!

Ingredients

  • 400g sweet potatoes
  • 160g sugar
  • 80g coconut oil (melted)
  • 140g vegan dark chocolate (melted)
  • 100g self-raising flour
  • 1 teaspoon espresso powder
  • 1 teaspoon vanilla extract
  • a pinch of salt
  • 50g hazelnuts
  • 50g vegan white chocolate chunks

Method
1. Peel, chop and steam or boil the sweet potato until soft.
2. Line a 20x20cm Pyrex dish with baking parchment. Pre-heat the oven to gas mark 4.
3. In food processor whizz the sweet potato into a puree. Add the sugar, melted coconut oil, melted dark chocolate, self-raising flour, espresso power, vanilla extract and a pinch of salt and whizz until combined. The brownie batter will be quite thick.
4. Mix in the hazelnuts and vegan white chocolate chunks using a spatula.
5. Transfer the brownie in the Pyrex dish and bake for 45-50 minutes. Enjoy hot or cold!

Thanks for the inspiration go to @plantbased.recipes

Sweet Potato Brownies


header

Desserts, vegan

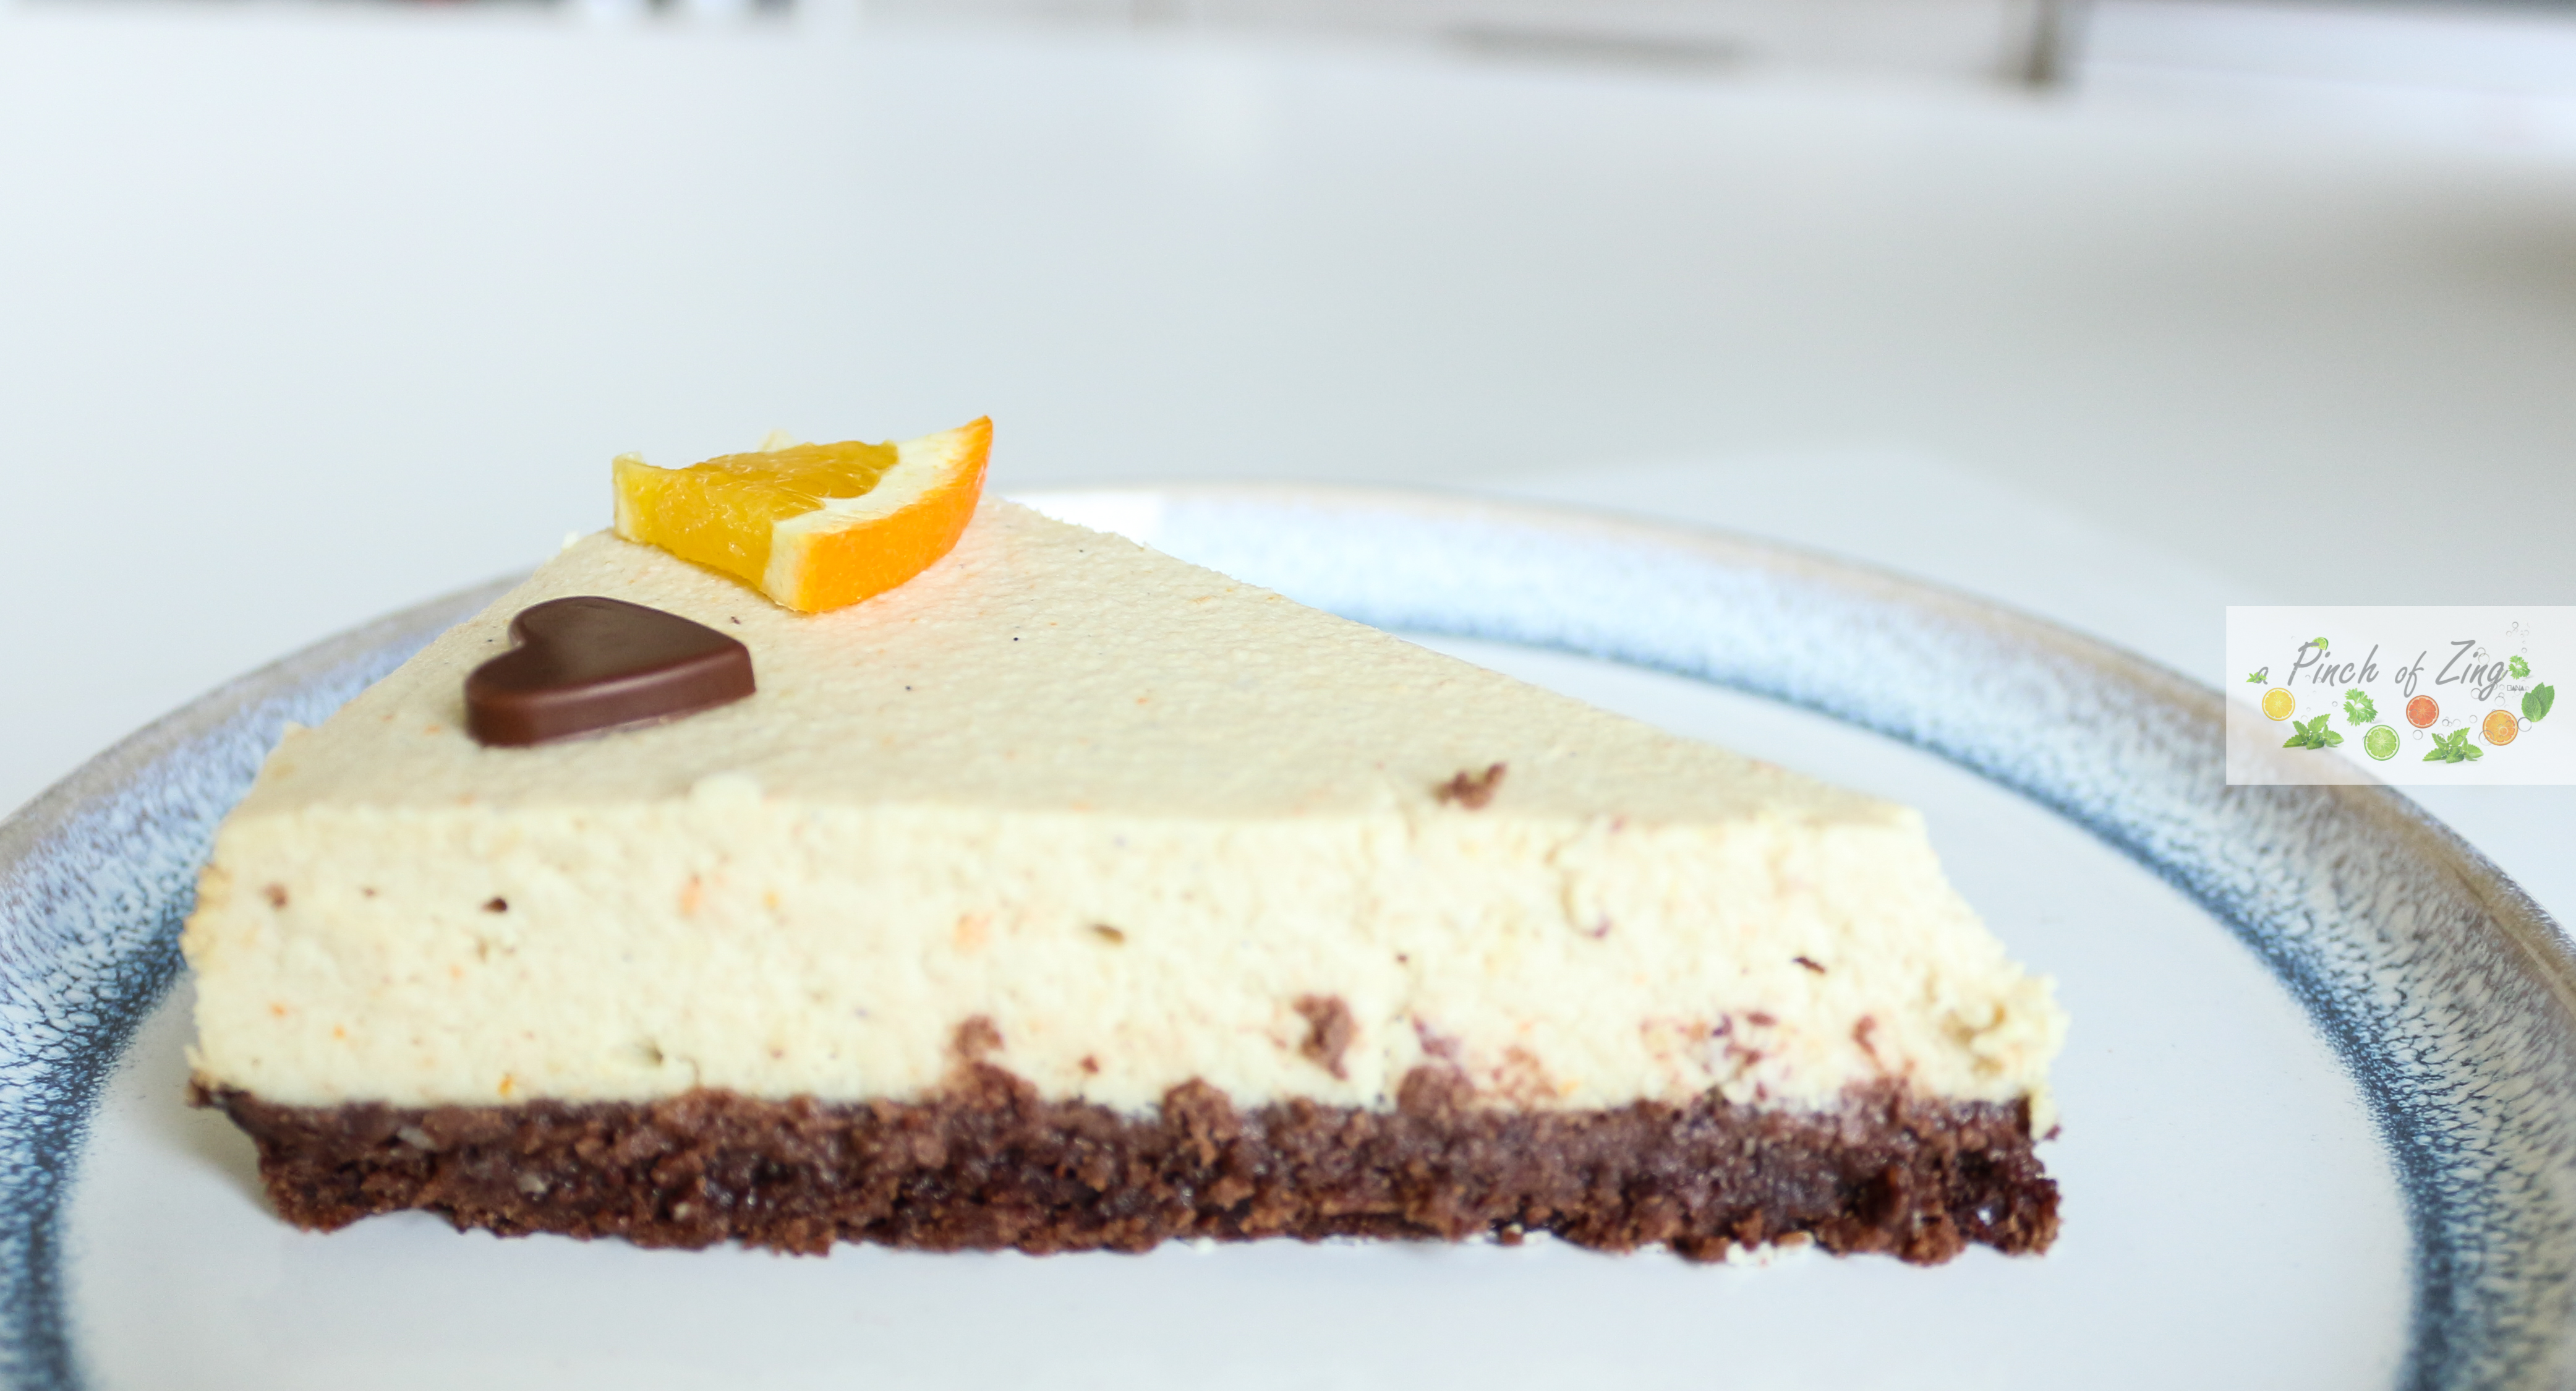
Chocolate orange cheesecake (Vegan)

Makes 10 servings

Chocolate orange cheesecake (Vegan)

Unbelievably rich and creamy chocolate orange ‘cheesecake’.
After my successful classic vanilla baked cheesecake I feel that the sky is the limit (as far as vegan cheesecake goes 😊). I made this new variation for Christmas day lunch and it was very well received!

It is amazing how the texture and taste of this baked no-cheesecake is so much like a traditional cheesecake. Also, unlike traditional cheesecake, this plant based version doesn’t seem to be prone to cracks, so you can have the perfect no-cheesecake every single time.

The flavours I choose this time are crowd pleasers: chocolate and orange.
The crunchy biscuit base is made using Bourbon biscuits (Lidl’s own brand), which are accidentally vegan. Make sure you check the label, as I found that not all brands of Bourbon biscuits are vegan.
I hope you feel inspired to give this amazing cheesecake a try!

Ingredients

Biscuit base

  • 220g vegan Bourbon biscuits
  • 1 tablespoon Flora buttery (melted)

No-cheese cheesecake filling

  • 190g cashew nuts (soaked)
  • 350g firm silken tofu (pressed)
  • 200ml almond milk
  • 100g vegan white chocolate (melted)
  • 2 tablespoons sugar
  • 1/2 lemon (juice)
  • ½ orange (zest & juice)
  • 1 teaspoon vanilla extract

Method

  1. Prep work: soak the cashew nuts in boiling water for a coupe of hours; wrap the tofu in kitchen paper roll and press for a couple of hours.
  2. Preheat the oven to gas mark 4. Use a food processor to pulse the biscuits to a breadcrumb consistency. Pour in the melted Flora and combine. Press the biscuit mixture into the base of a 9 inch/23 cm tart tin.
  3. In a blender, whizz together all the cheesecake ingredients until smooth. The resulting texture should be similar to sour cream and should be pourable. Add more almond milk if the resulting texture is too thick.
  4. Pour the no-cheesecake filling over the biscuit base and bake for 30 minutes. Leave the cheesecake cool down in the oven, with the oven door half open. Once cool, store in the fridge and serve with more orange and chocolate. Enjoy!

Chocolate orange cheesecake (Vegan)

header